

Hello! It's the end of July but it's still July so I thought that I would have a little Christmas In July and give away a couple of my paid patterns! Jingle the Elf Hat is now a FREE pattern for ya'll! I hope ya'll love it as much as I do! Please SHARE AWAY! Thank you all so much for following me! Scroll down for the free pattern!


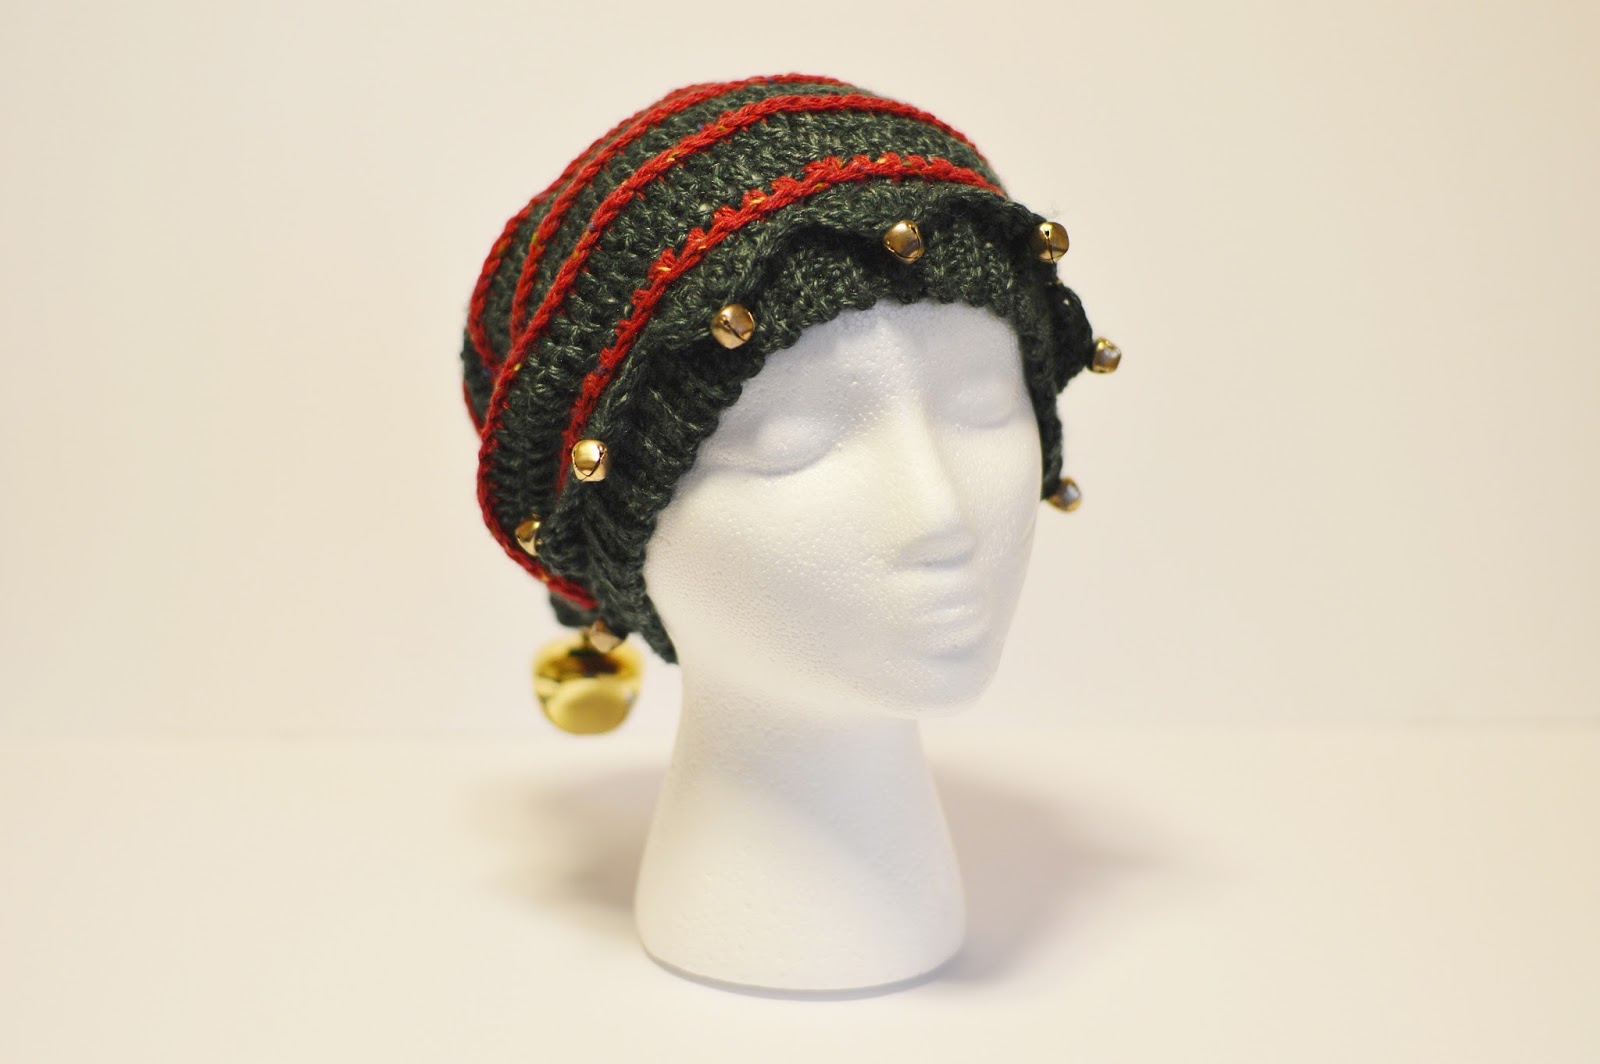
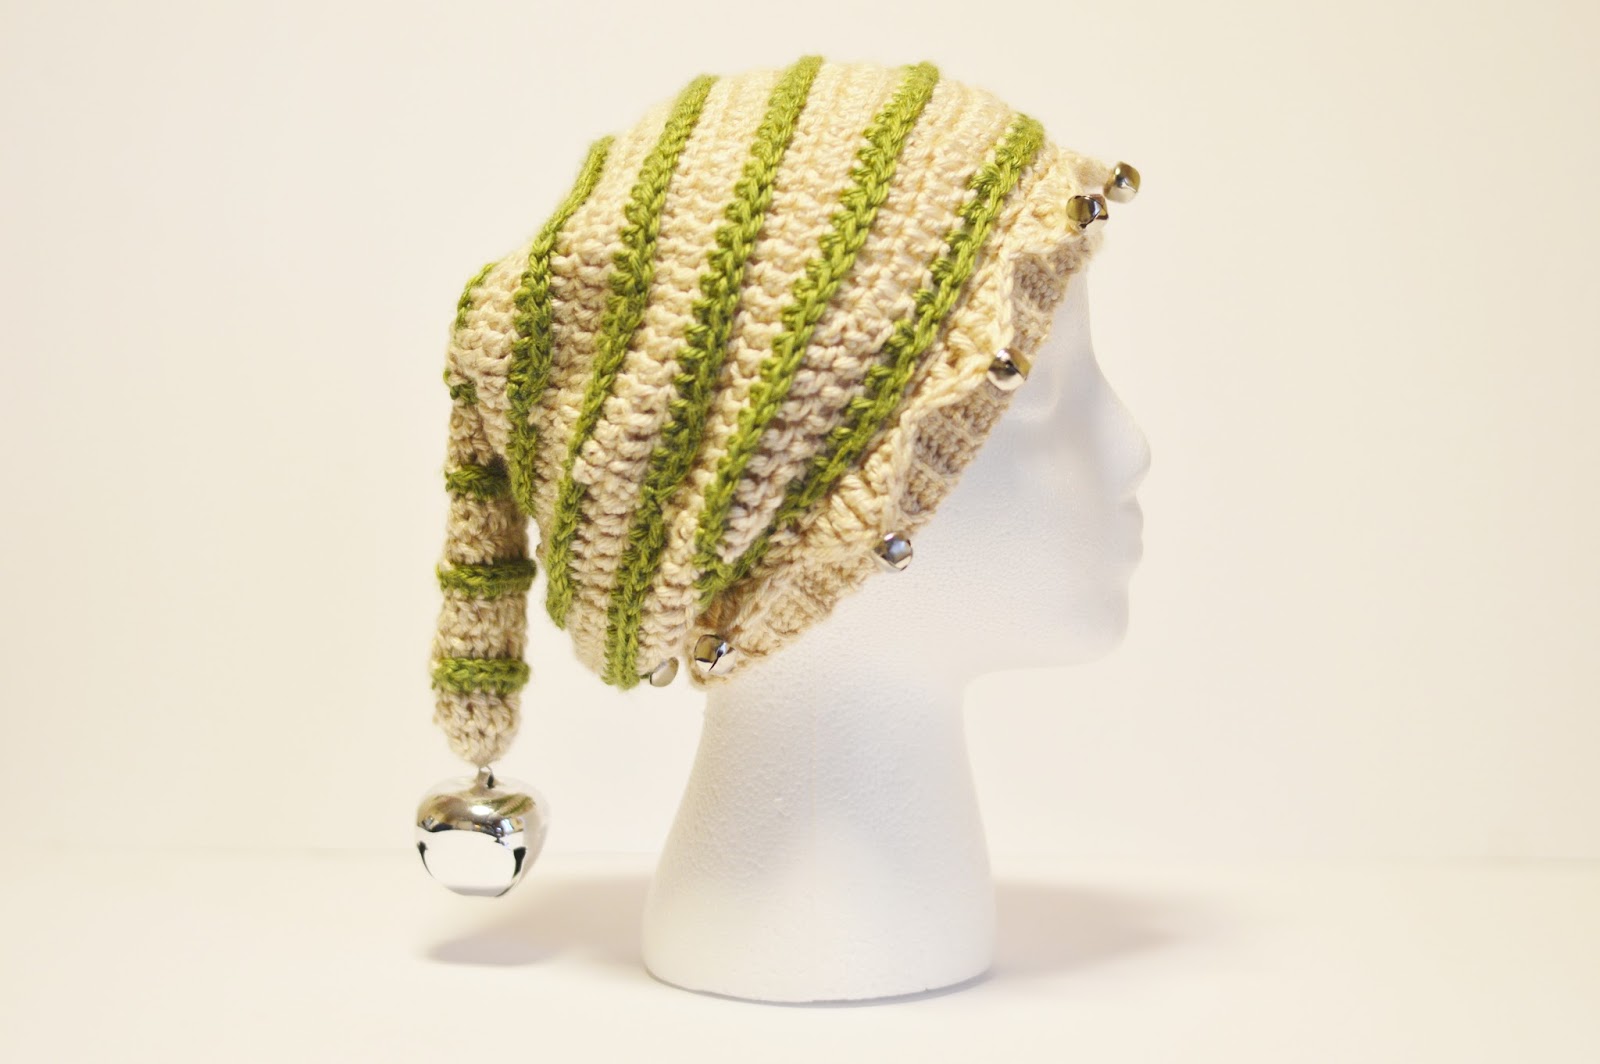
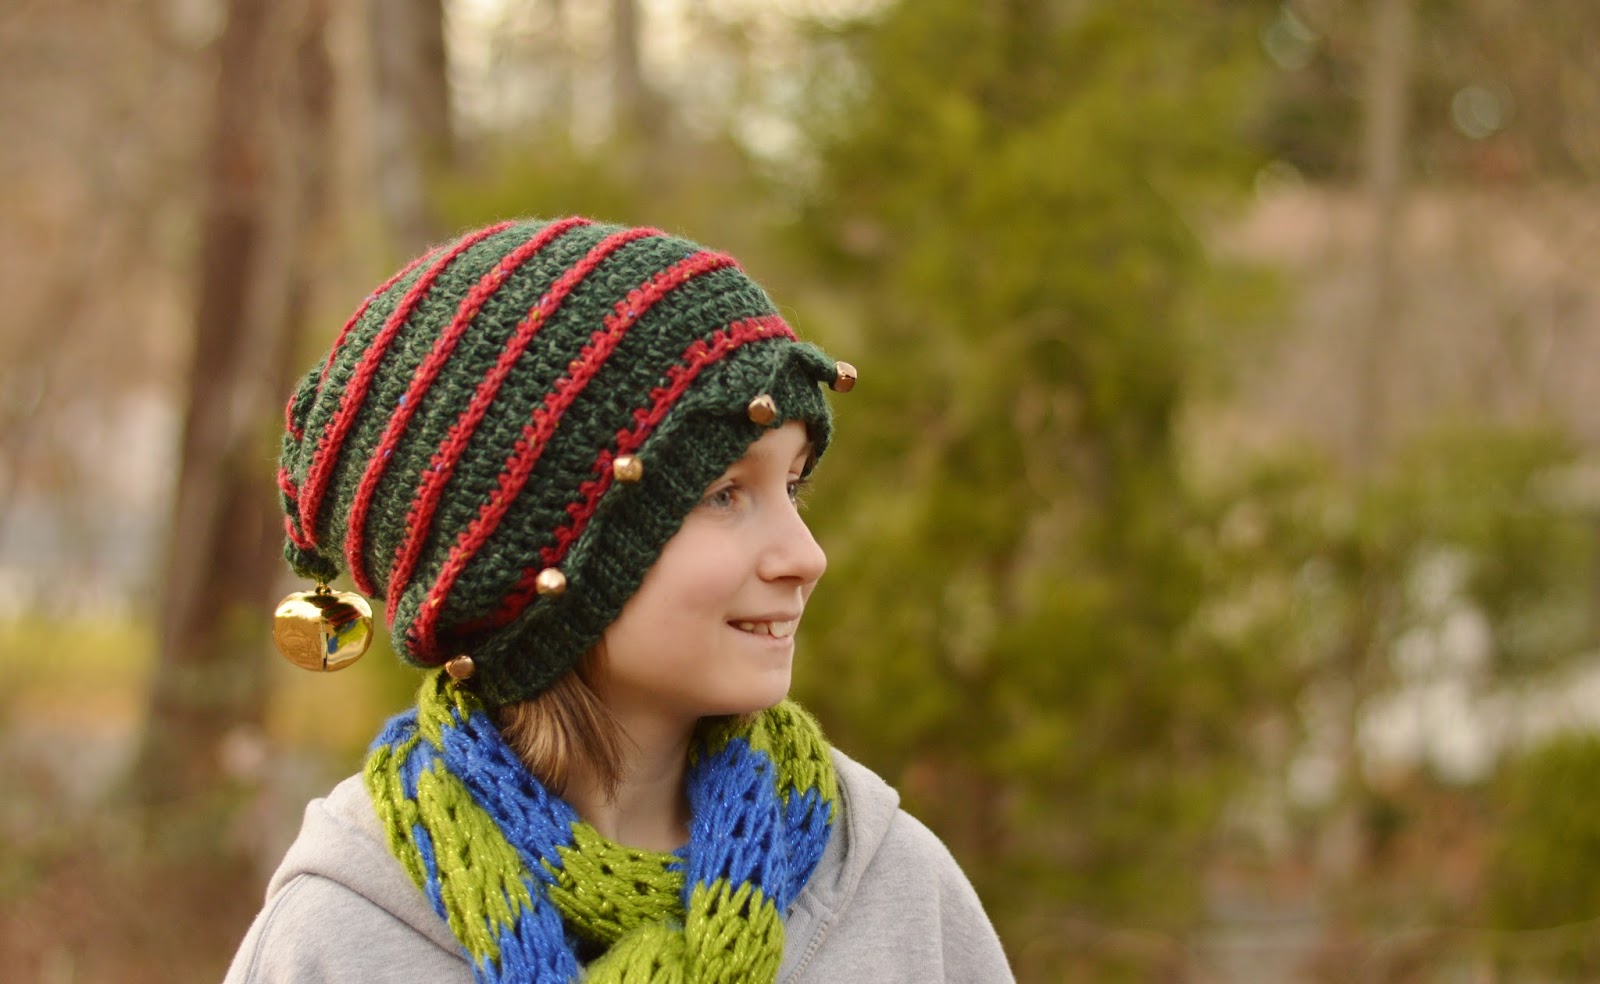
It has 10 little jingle bells that surround the face and a large jingle bell attached to the tail of the hat. You can also use a furry pom pom or a yarn puff ball. I haven't gotten to try a furry pom pom yet, but the yarn puff balls look really cute!


You can also play around with the colors of the hat and the jingle bells. I've only found gold and silver jingle bells but I think this hat would look great with all kinds of different colors!


This hat fits youths through adults with head circumferences between 18-22 inches.

Jingle The Elf Hat
US terminology
Size
Fits youths through adults with head circumferences of 18-22 inches
Materials
- Size G (4.00 mm) and Size F (3.75 mm) crochet hooks
- Medium 4 Yarn (main color: 90 grams contrasting color: 50 grams)
- (1) 45mm jingle bell or furry pom pom or yarn puff ball
- (10) 15mm jingle bells
- Darning Needle that will fit through the eyes of the 15mm jingle bells
- Darning Needle for weaving in the ends
- Measuring tape
- Scissors
- Stitch markers or scrap yarn
Gauge
8 dc and 4 rows = 2 inches
Abbreviations
ch: chain
sl st: slip stitch
cc: color change
sc: single crochet
hdc: half double crochet
2hdc: half double crochet increase
dc: double crochet
2dc: double crochet increase
hdc2tog: half double crochet decrease
dc2tog: double crochet decrease
FLO: front loop only
Slst2tog: slip stitch decrease
tc: triple crochet
BLO: back loop only
Instructions, Tutorials, Tips, And Helpful Information
The Jingle Bell Elf Hat is a very cozy and stretchy hat and it’s easy and fun to make! The finished hat circumference is 16 inches but it needs to stretch to fit comfortably. This hat should fit children, teenagers, and adults with head circumferences between 18-22 inches.
This hat is worked in the round from the top down. The brim of the hat is worked flat in rows.
Jingle bells: I found the jingle bells at my local Wal-mart. The 15 mm jingle bells were in the craft section and the 45 mm jingle bells were in the christmas section. You may use whatever size jingle bells that you can find or prefer.
Optional: You may use a furry pom pom or a yarn puff ball instead of the 45 mm jingle bell to go on the tail end of the hat. I think that both ways look super cute!
How To Crochet Into The 3rd Loop https://www.youtube.com/watch?v=j-gFiKM5b4w&index=20&list=PLv0uTfbKPb4-zStExb4ucJMwK51wvOXhg
How To Color Change with hdc or half double crochet stitches:
Yarn over, insert the hook into the next stitch, yarn over and pull up a loop. You should have 3 loops on the hook. Yarn over with the new color and pull the hook through the 3 loops on the hook.
How To Color Change with dc or double crochet stitches:
Yarn over, insert the hook into the next stitch, yarn over and pull up a loop. You should have 3 loops on the hook. Yarn over, pull the hook through the first 2 loops on the hook. You should now have 2 loops remaining on the hook. Yarn over with the new color and pull the hook through the last 2 loops remaining on the hook.
How To Slst2tog: Insert the hook into the next stitch, insert the hook into the next stitch. Yarn over, and pull the hook through all the loops on the hook.
hdc2tog or half double crochet decrease:
Yarn over, insert the hook into the next stitch, yarn over and pull up a loop. You should have 3 loops on the hook. Insert the hook into the next stitch, yarn over and pull up a loop. You should now have 4 loops on the hook. Yarn over and pull through the 4 loops on the hook.
dc2tog or double crochet decrease:
Yarn over, insert the hook into the next stitch, yarn over and pull up a loop. You should have 3 loops on the hook. Yarn over, pull through the first 2 loops on the hook. You should have 2 loops on the hook. Yarn over, insert the hook into the next stitch, yarn over and pull up a loop. You should now have 4 loops on the hook. Yarn over and pull through the first 2 loops on the hook. You should now have 3 loops remaining on the hook. Yarn over and pull through the 3 loops on the hook.
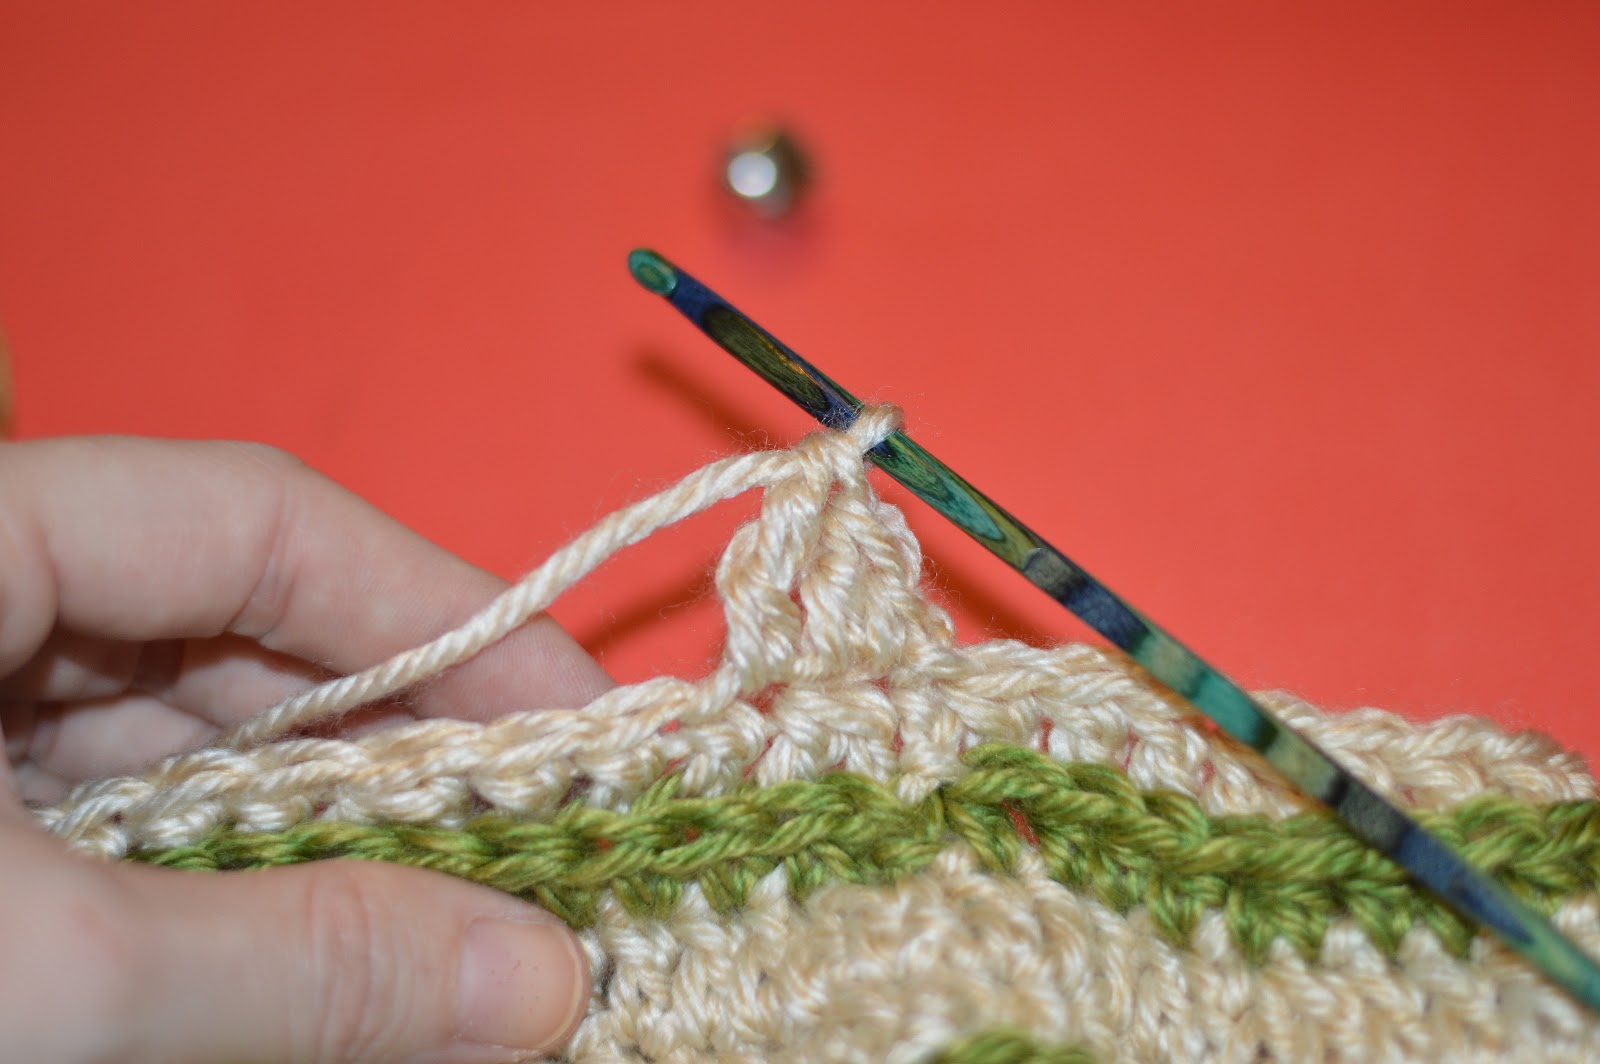
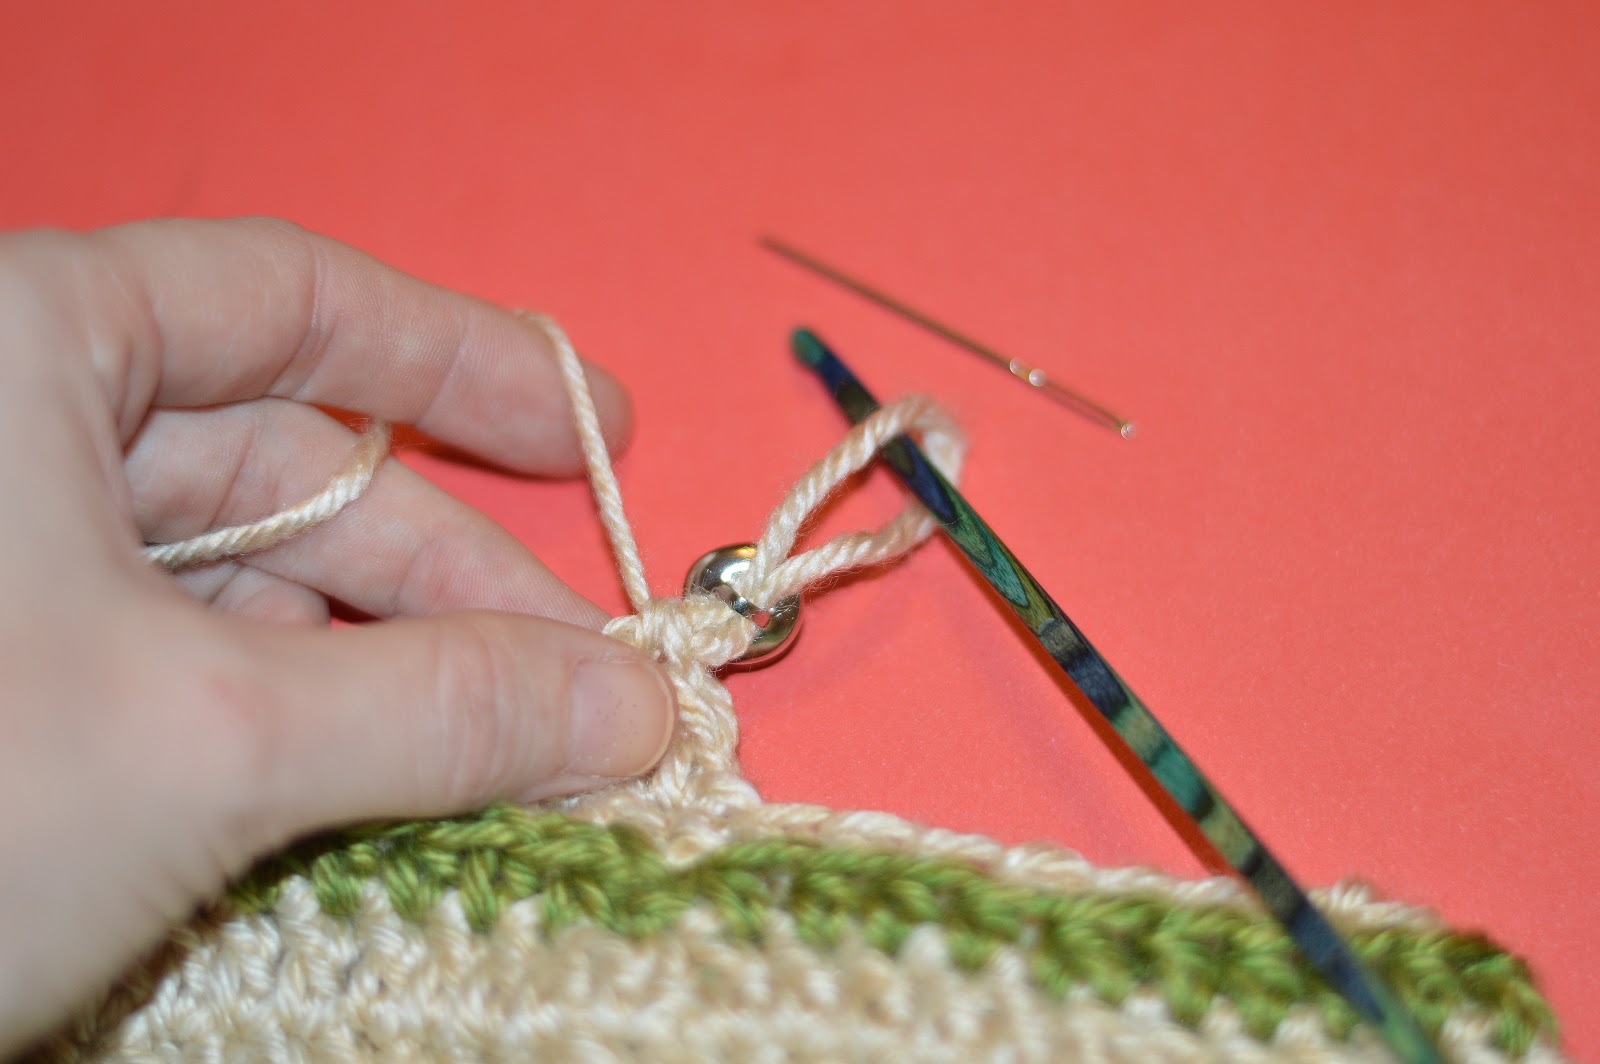
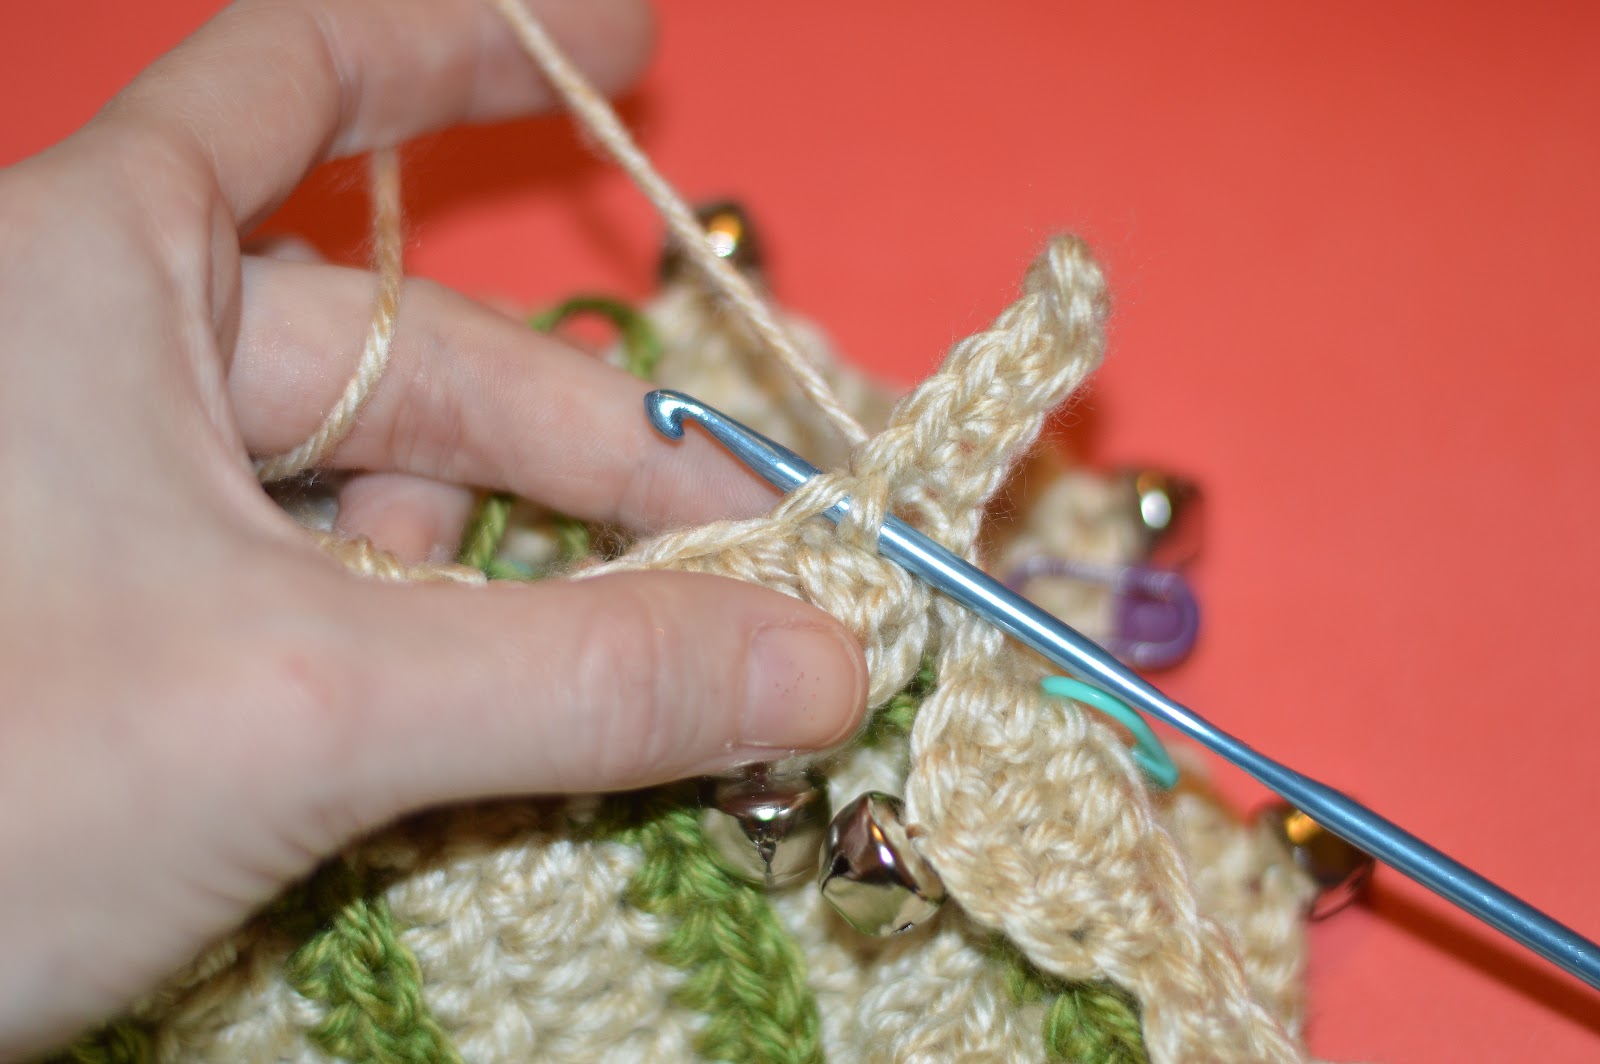
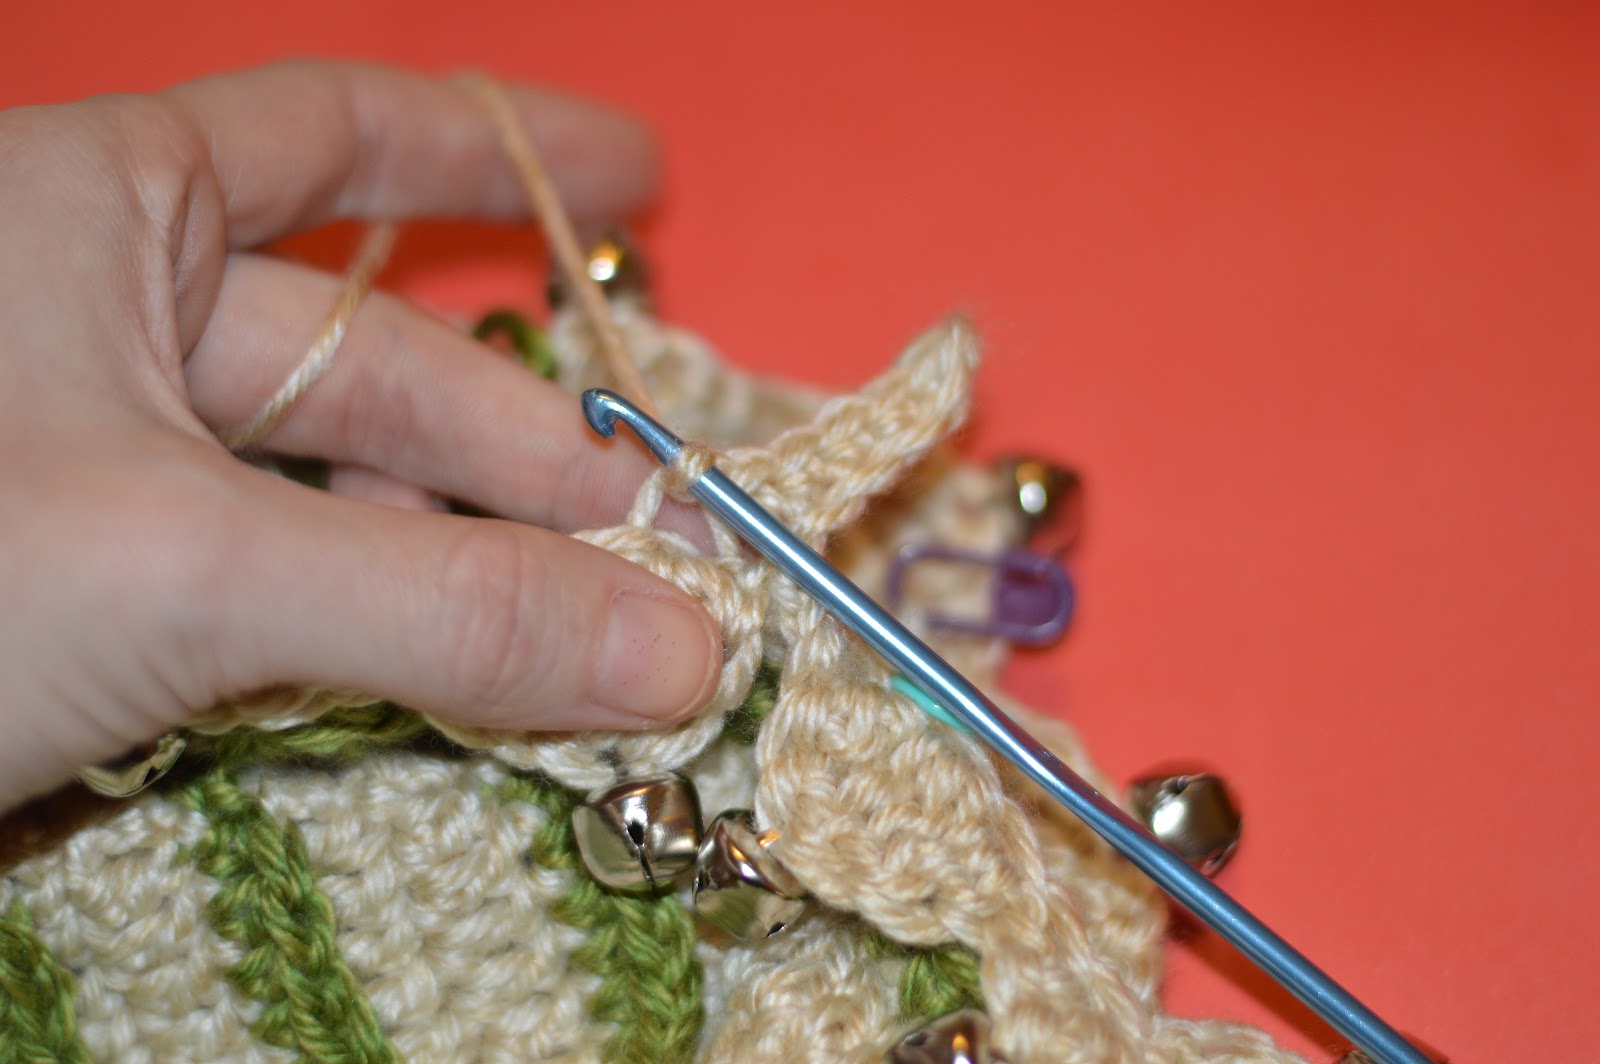
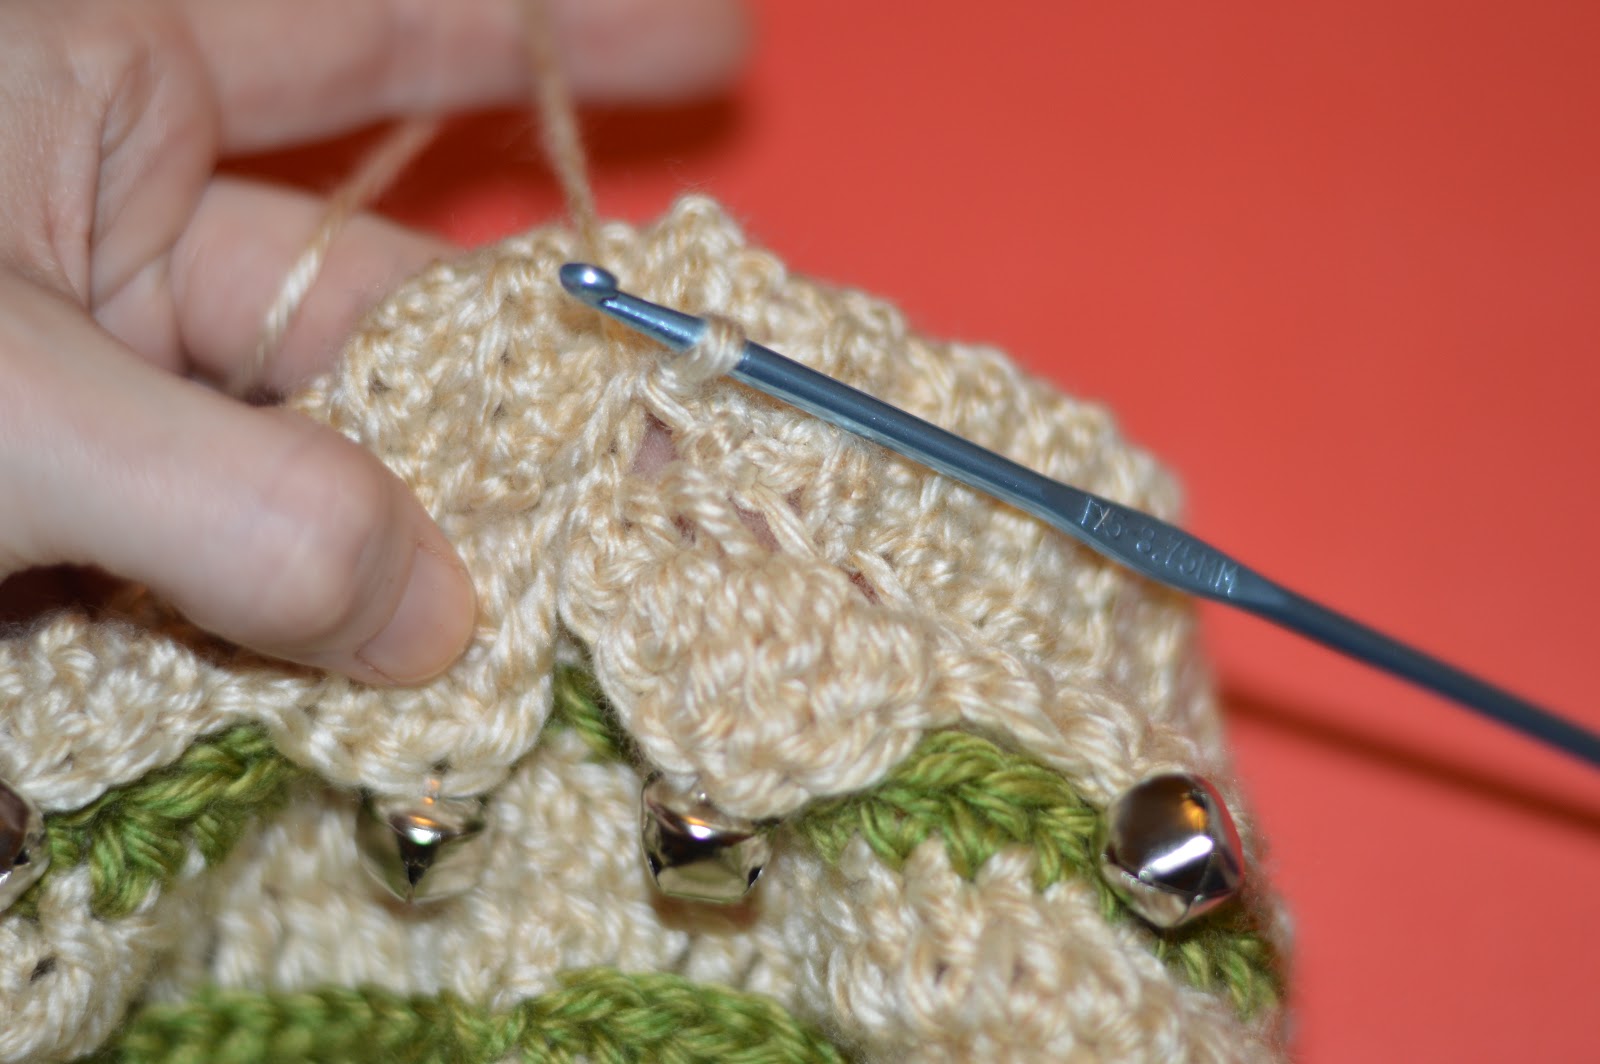
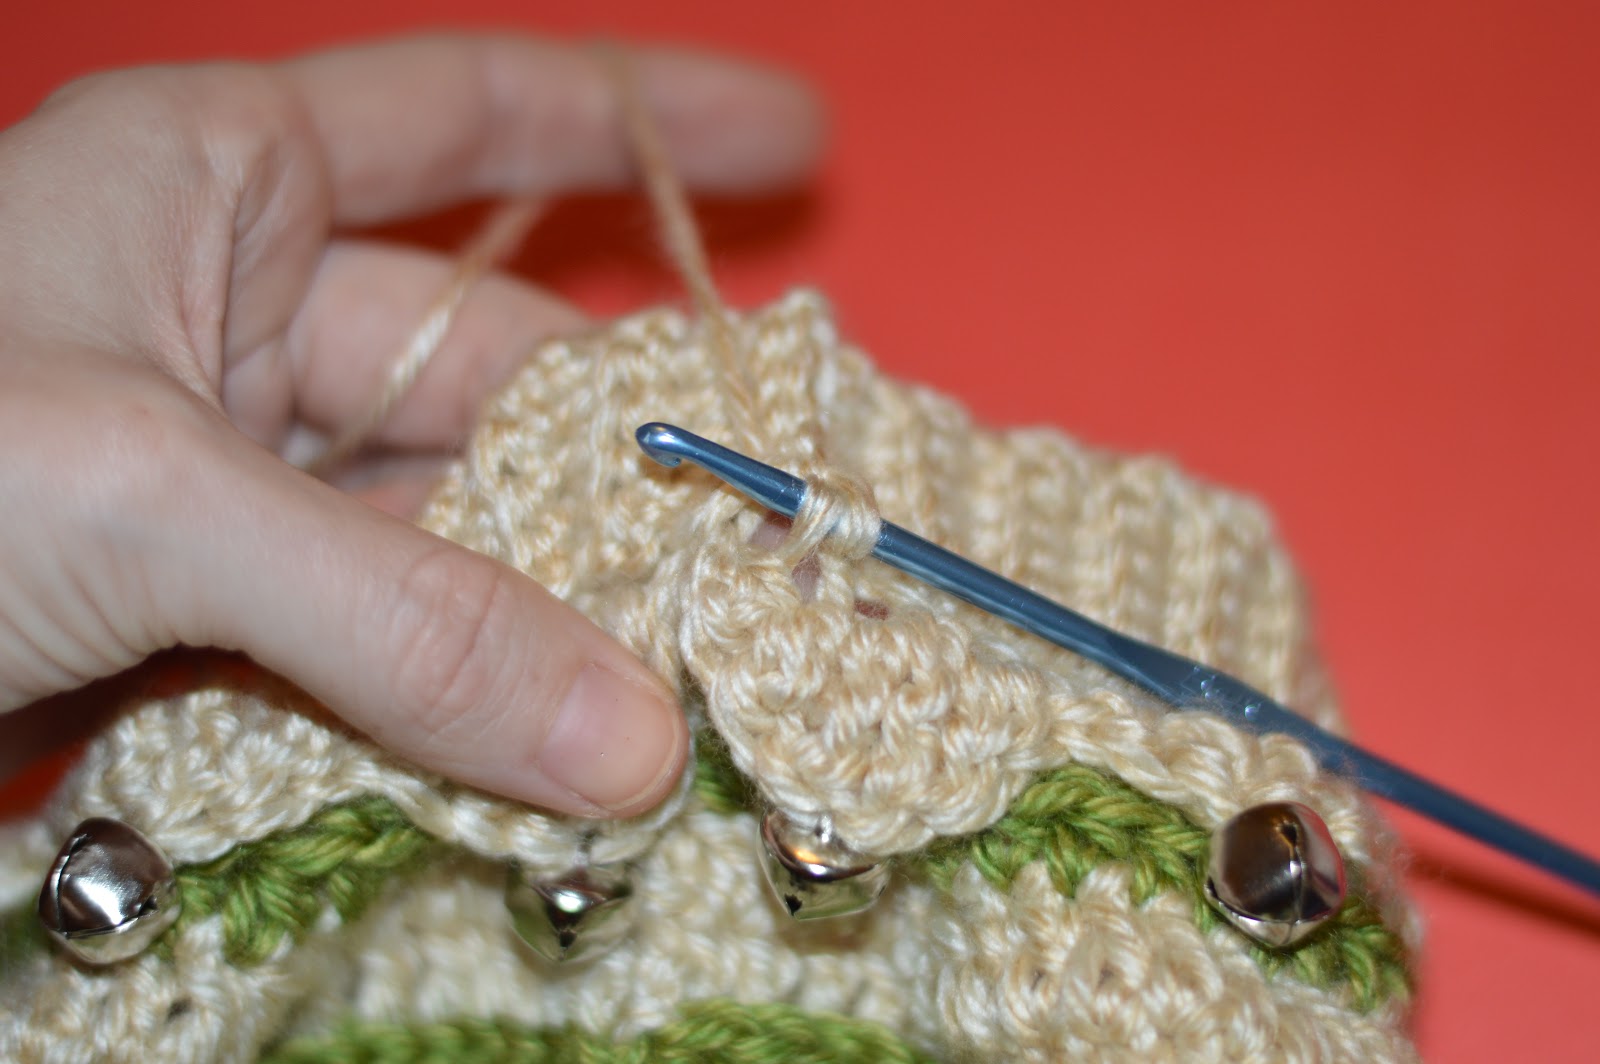
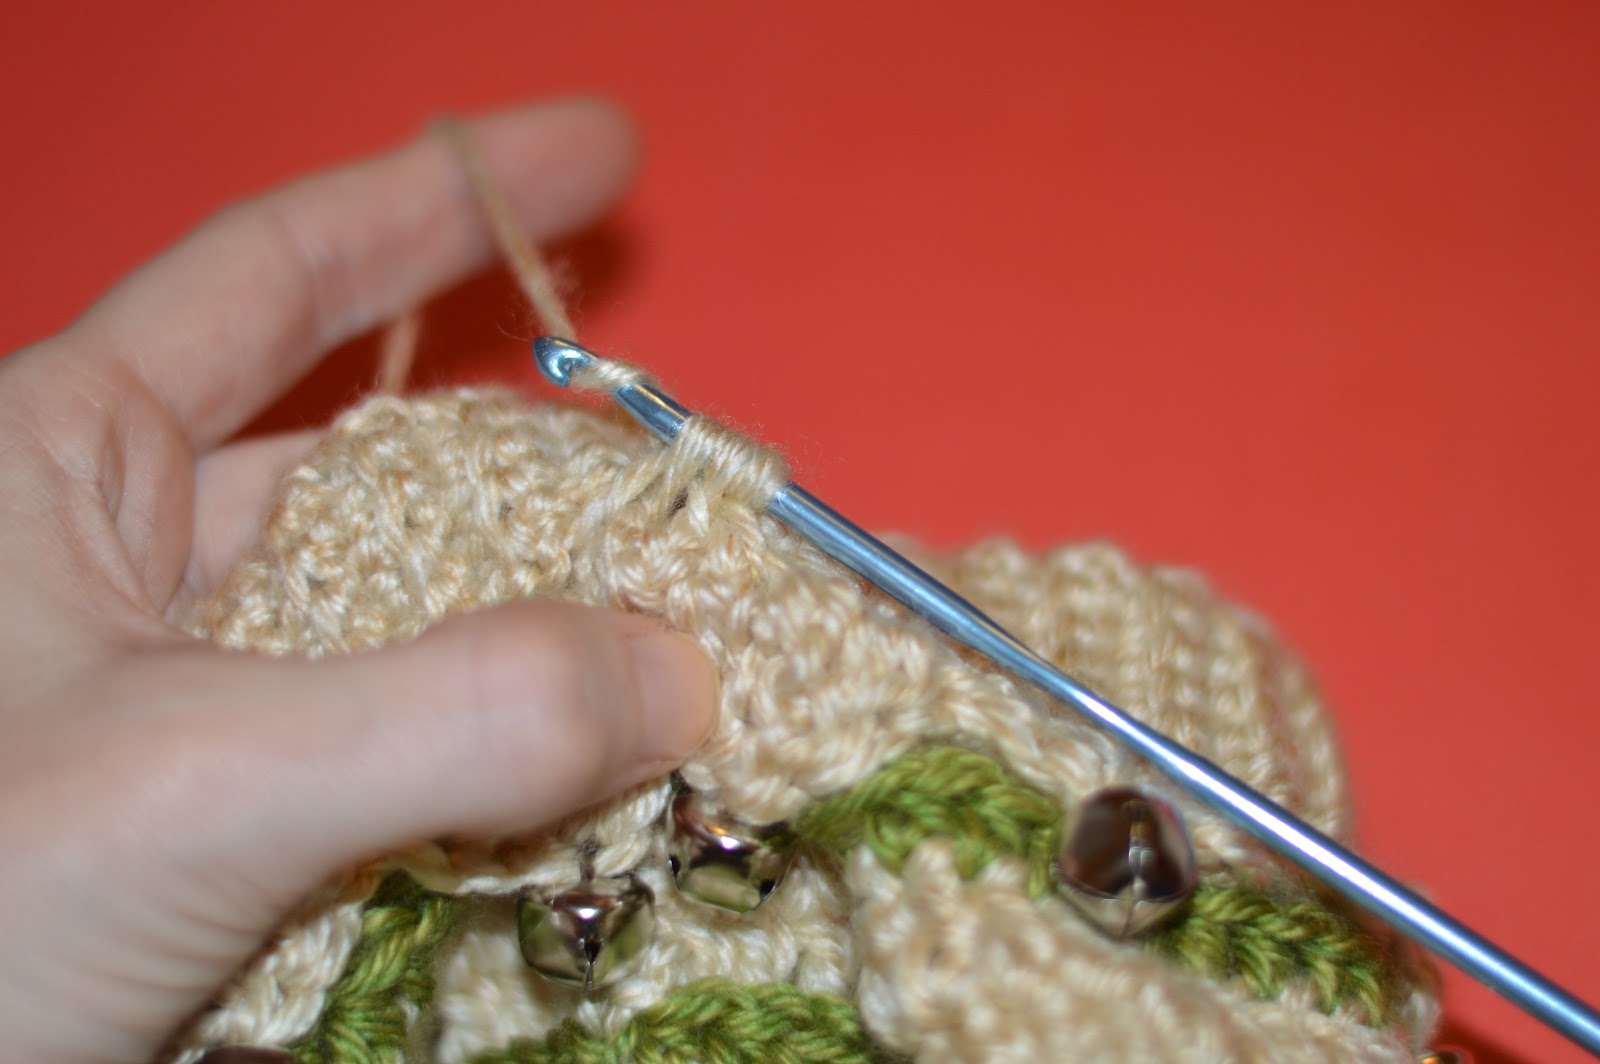
How to add the 15mm jingle bells:
After making the triple crochet, pull on the yarn to make the loop bigger. Take the hook out.


Thread the yarn through a darning needle that will easily fit through the eyes of the jingle bells. Make sure to not have a lot of excess yarn dangling out of the needle. It’s easier to thread through the eye of the jingle bell this way.

Thread the needle through the eye of jingle bell and remove yarn from the needle.
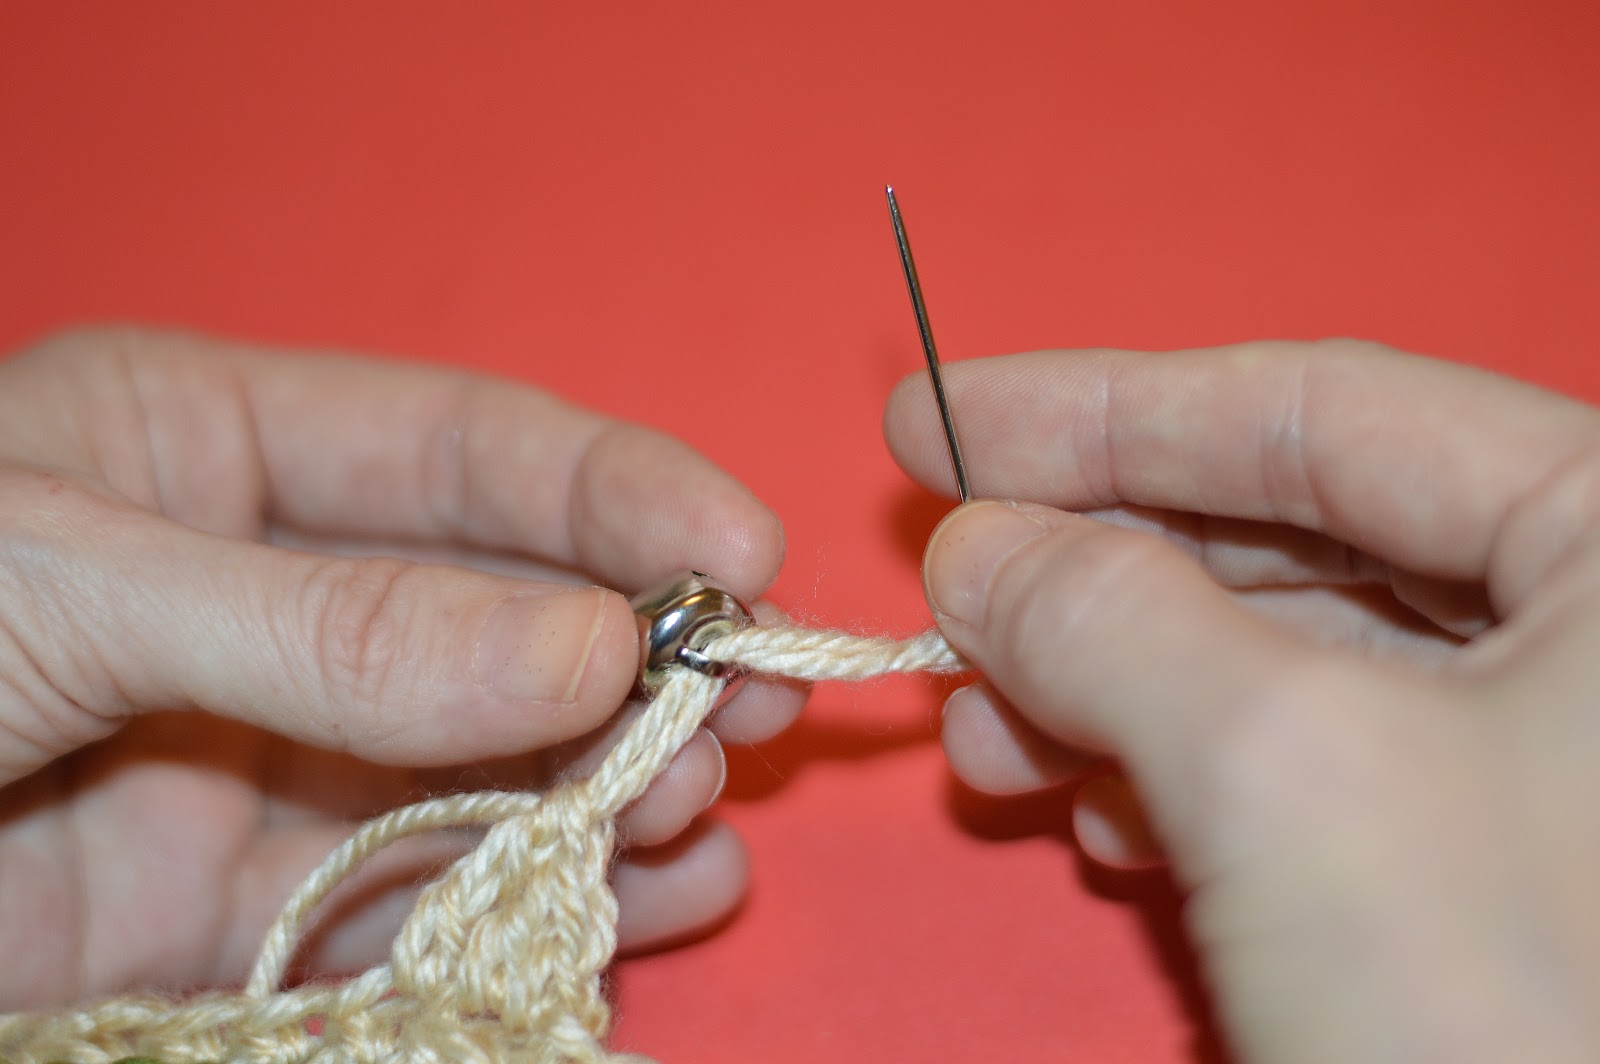
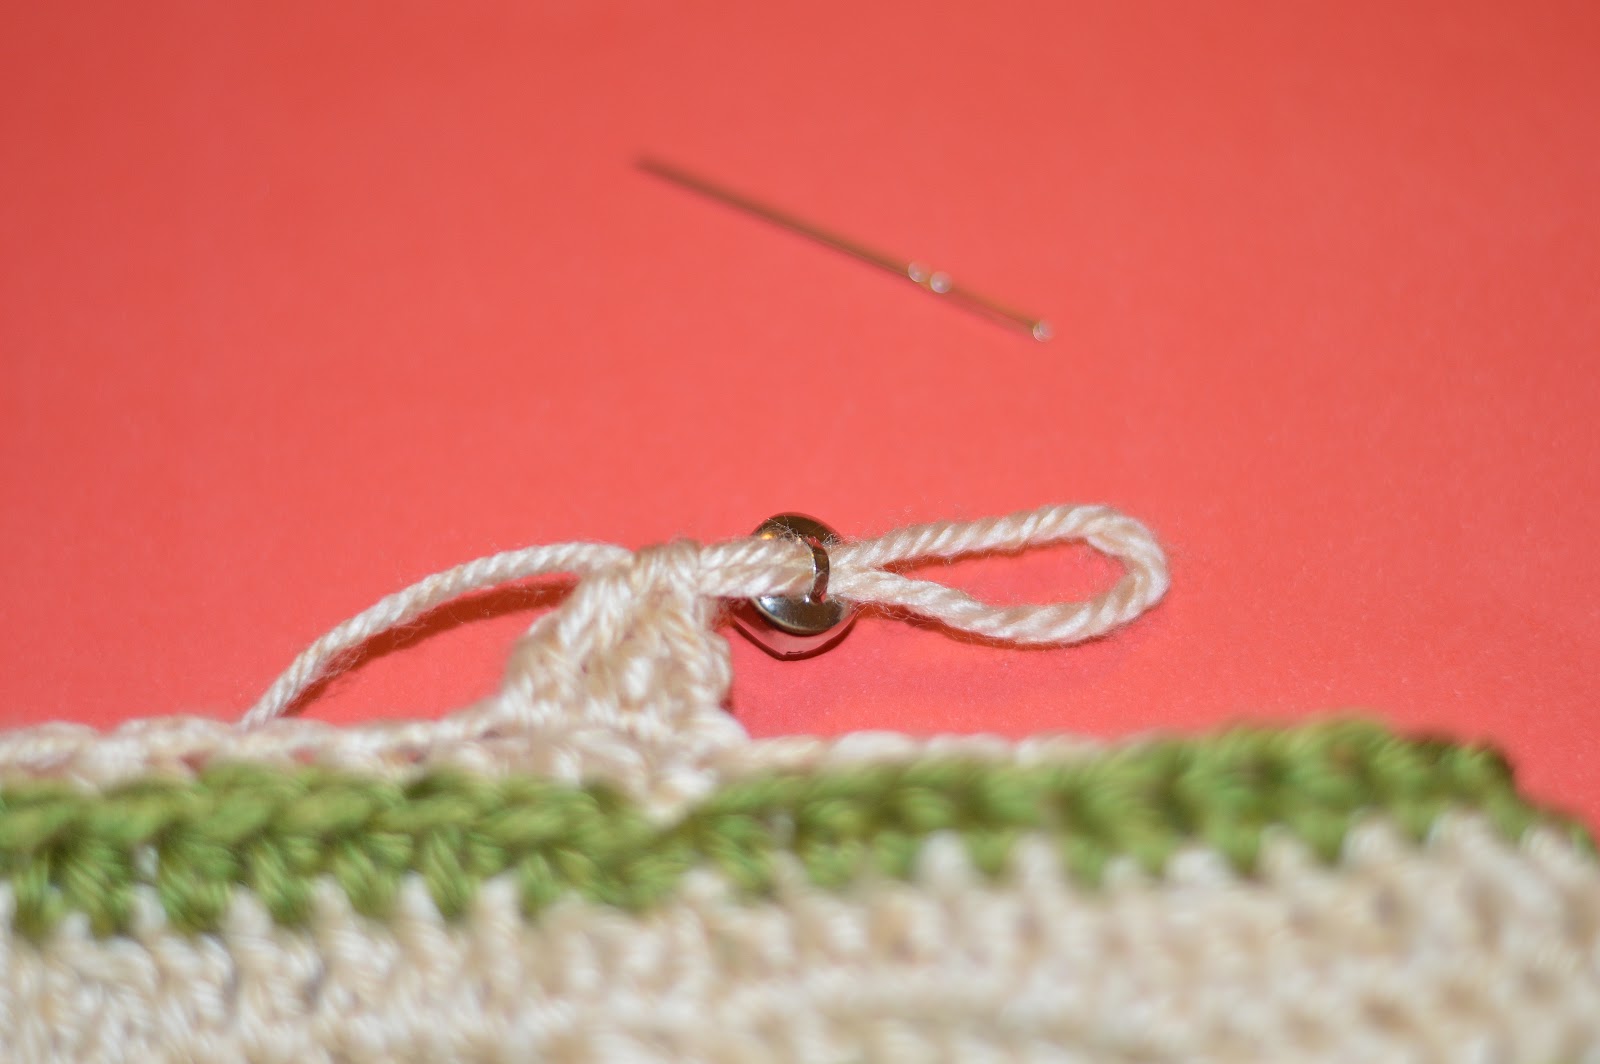
Insert the hook and pull on the yarn to tighten the loop. Continue with the pattern.

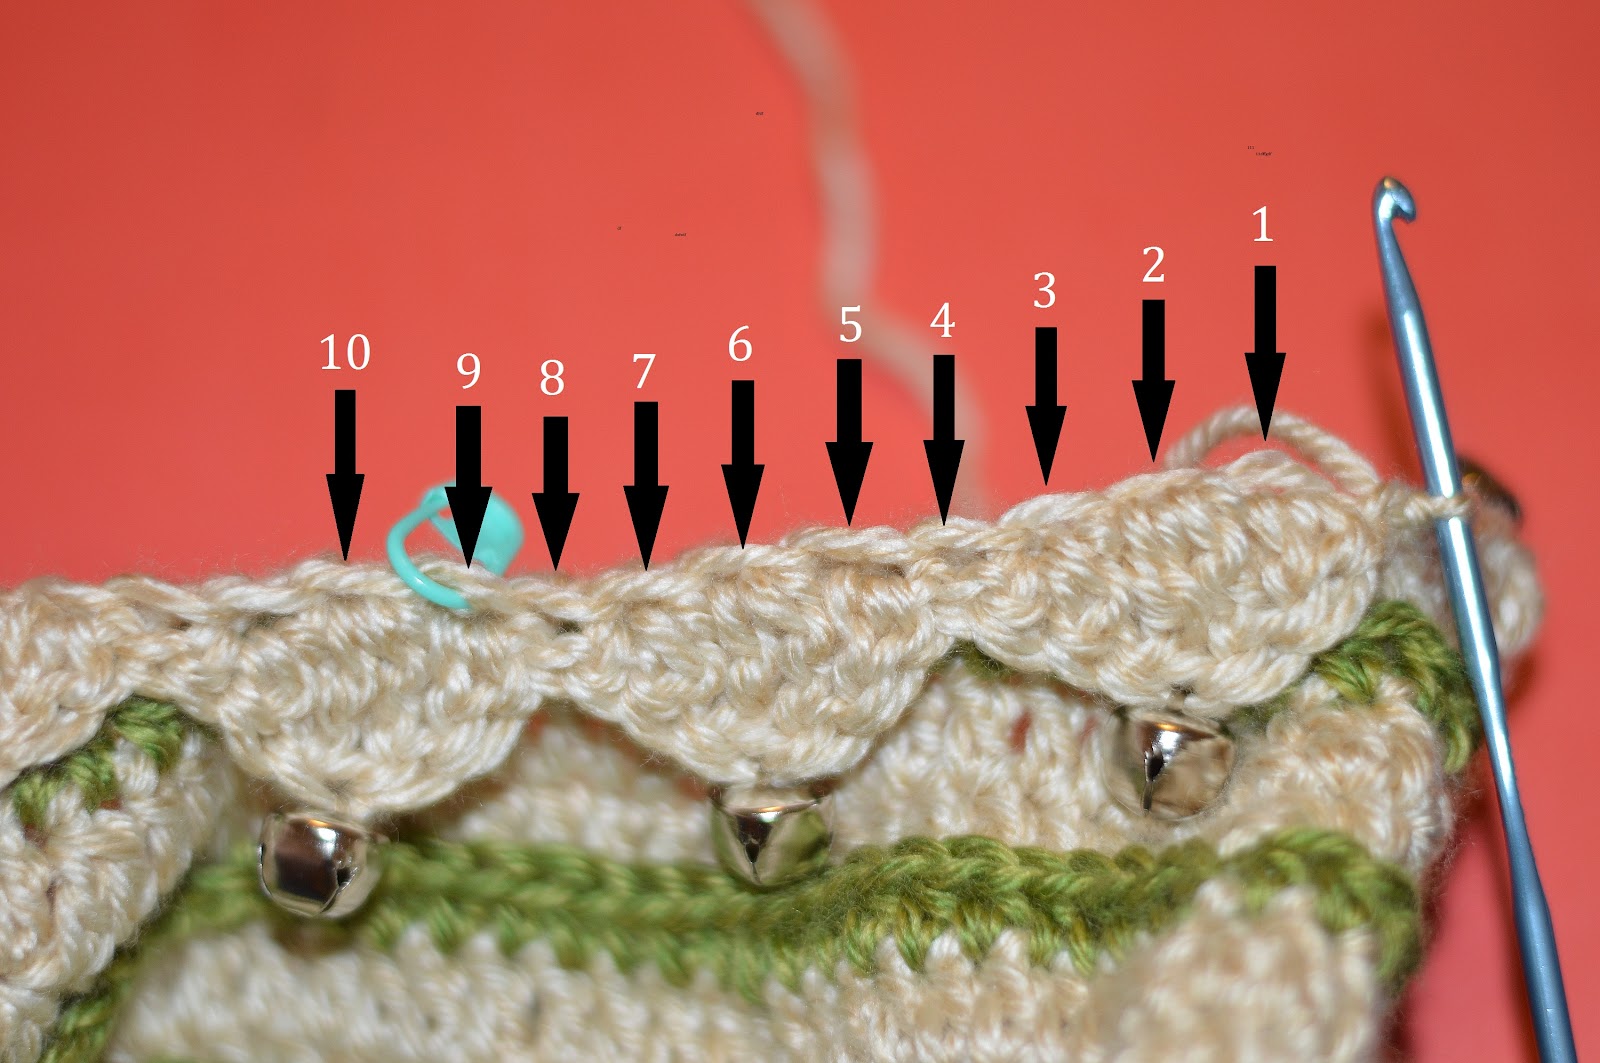
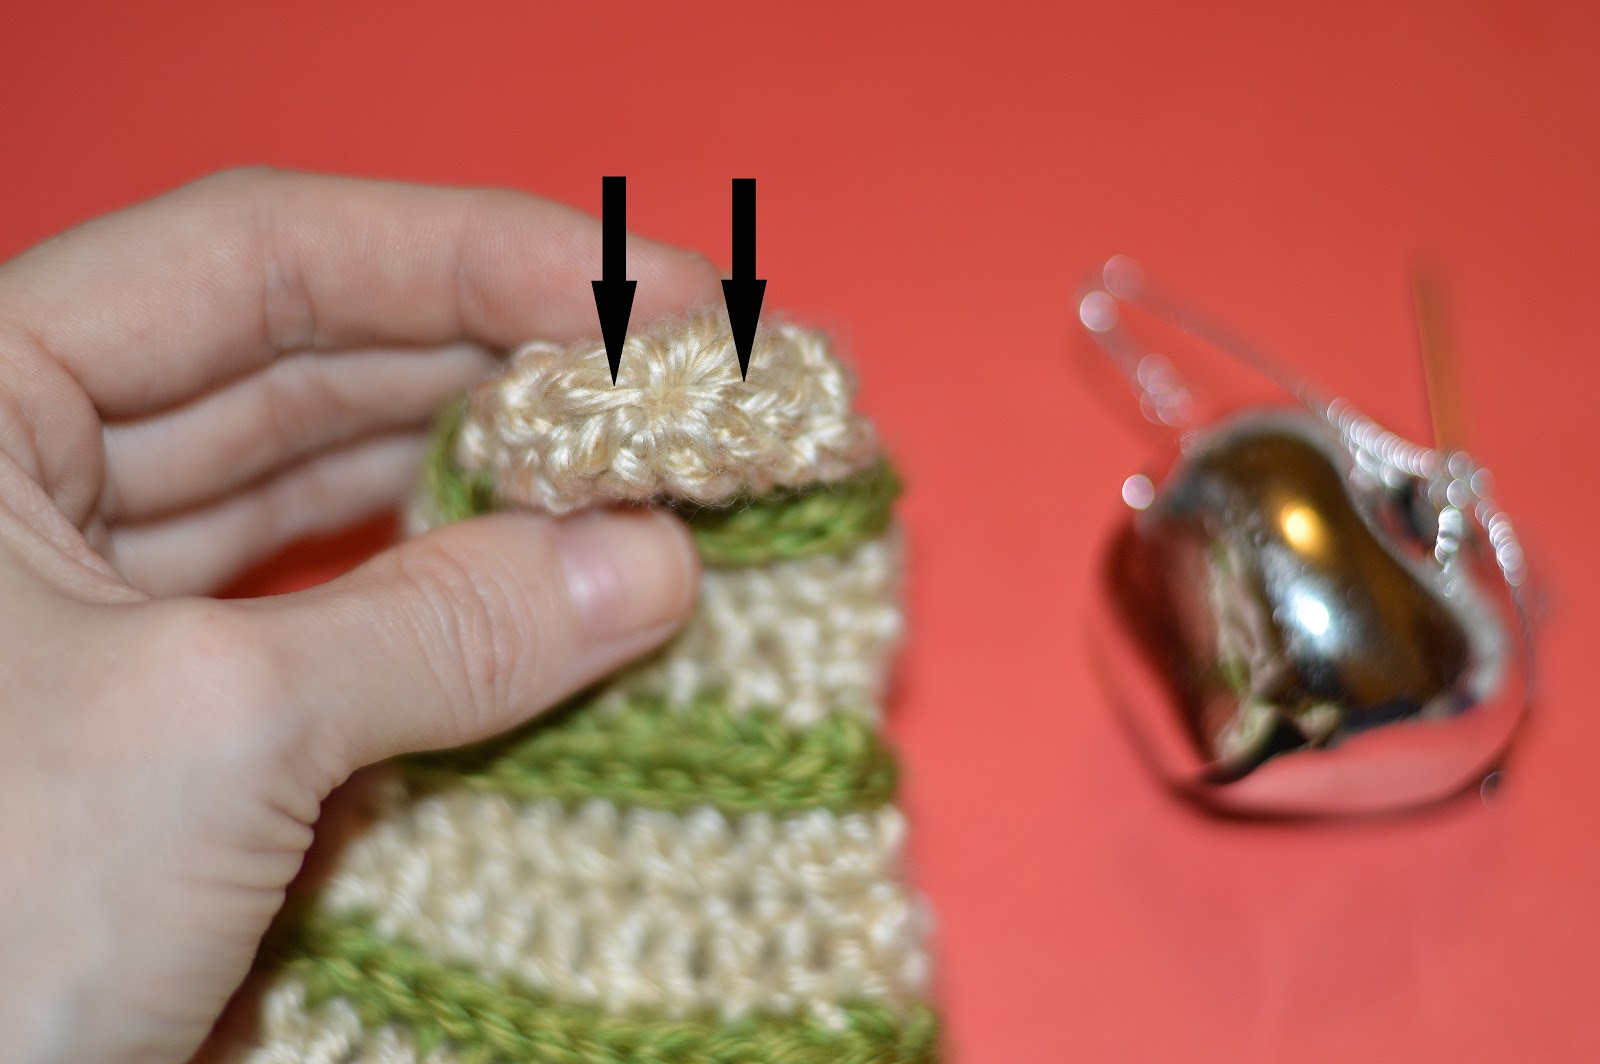
Before Starting The Brim:
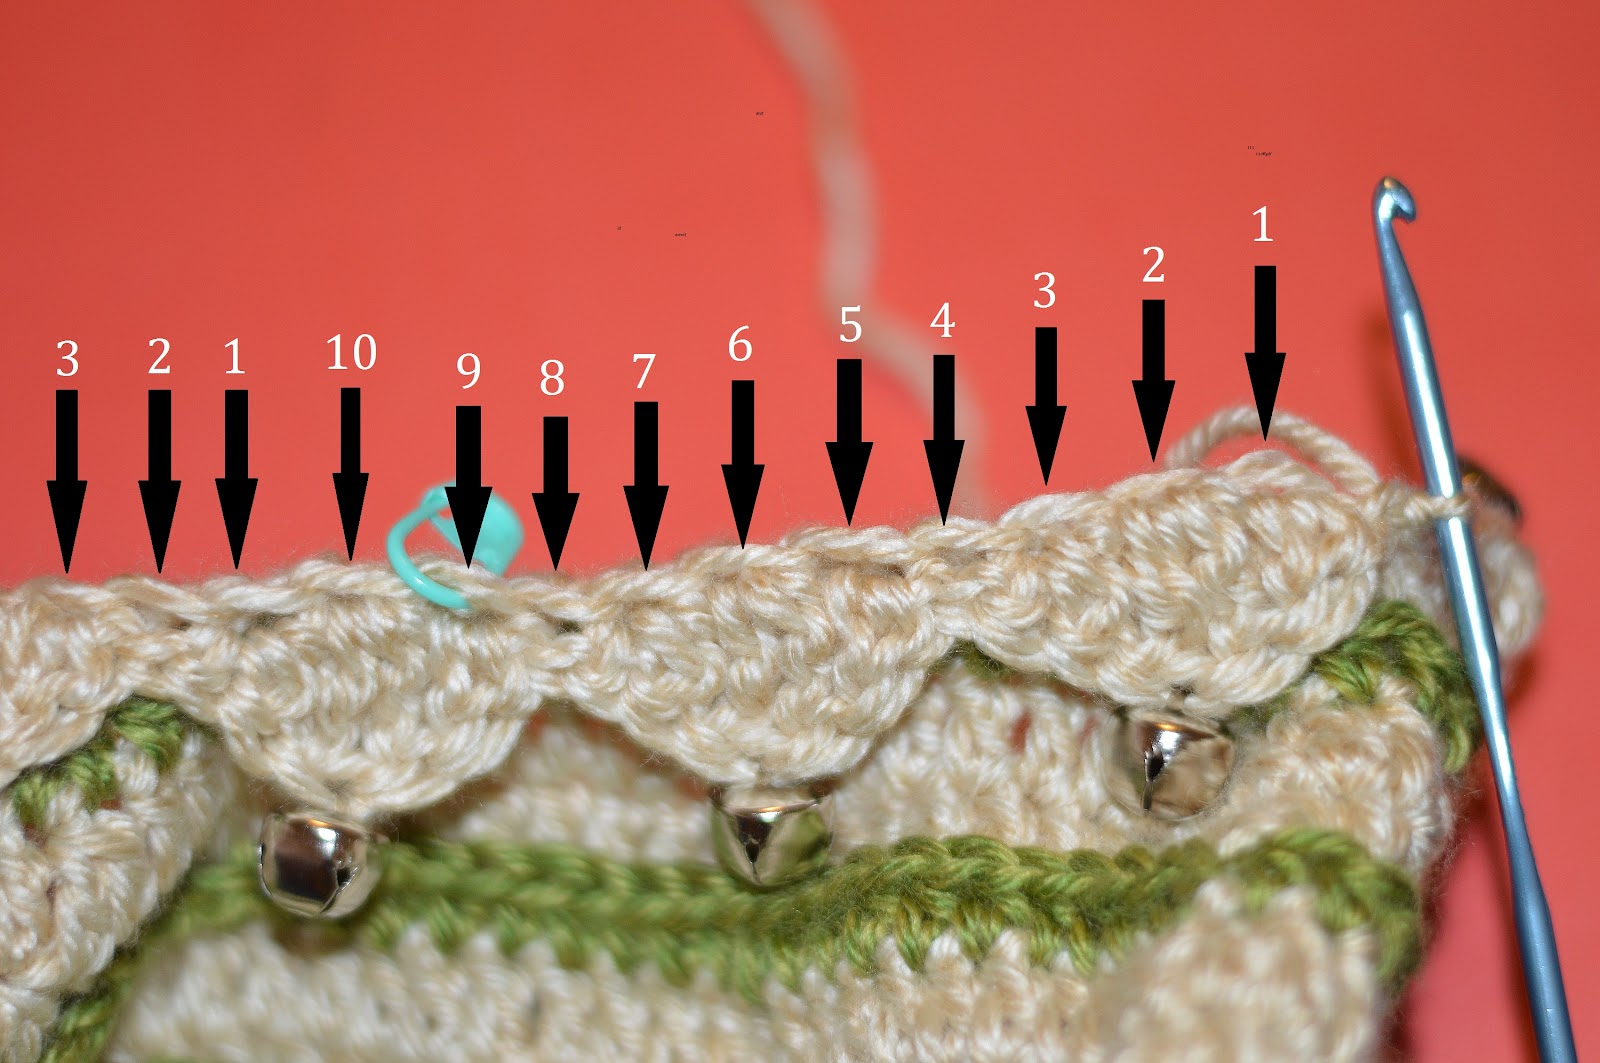
As you crochet the brim, you will slip stitch it to the back loops of R32. There will be slip stitch decreases or slst2tog. Use stitch markers or scrap yarn to mark where the slst2tog will go. Starting in the first back loop of R32, count the back loops till the 9th one. Add a stitch marker in the 9th back loop.

*Count the next back loop as the 10th back loop and start counting over until you reach the next 9th back loop. Add a stitch marker to the 9th back loop.*
Repeat from the star 2 more times. There should be 4 stitch markers in total.
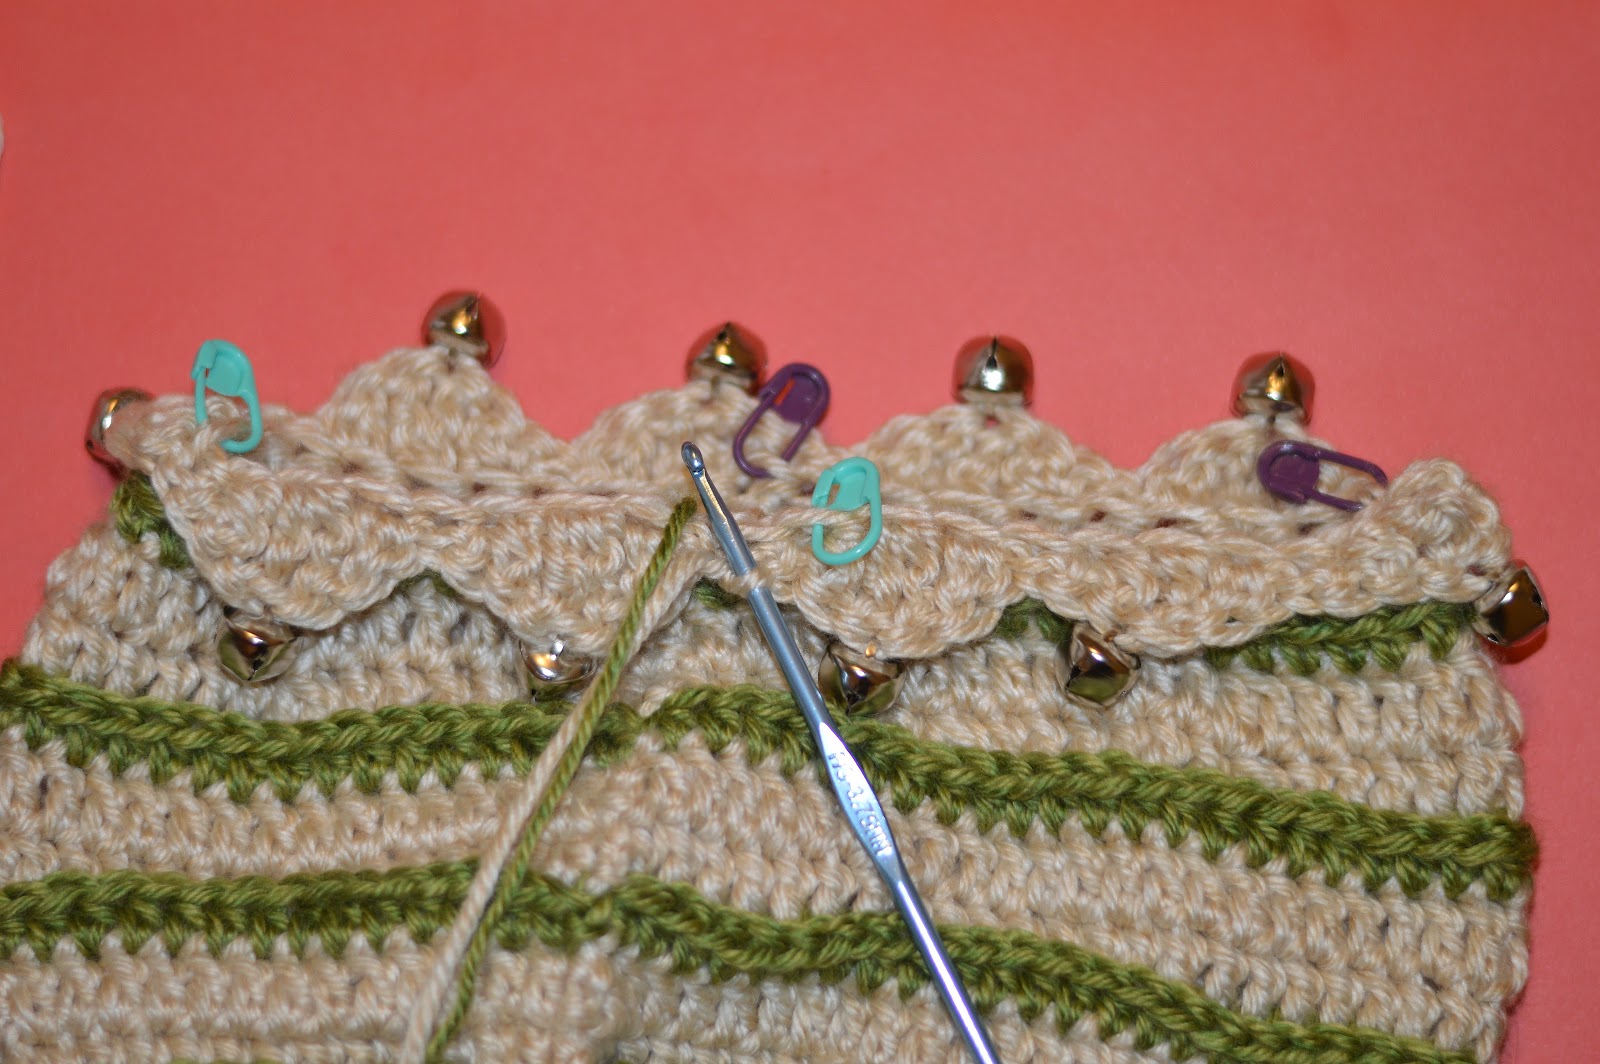
The Brim:
The brim of the hat is worked in rows that are slip stitched to the back loops of R32.
R1: Chain 6. Starting in the second chain from the hook, sc across 5x.

Slip stitch to the first back loop of R32 by inserting the hook into the first back loop, yarn over and pull through all the loops on the hook.


R2: ch 1 and turn your work, sc in the BLO of each single crochet across.

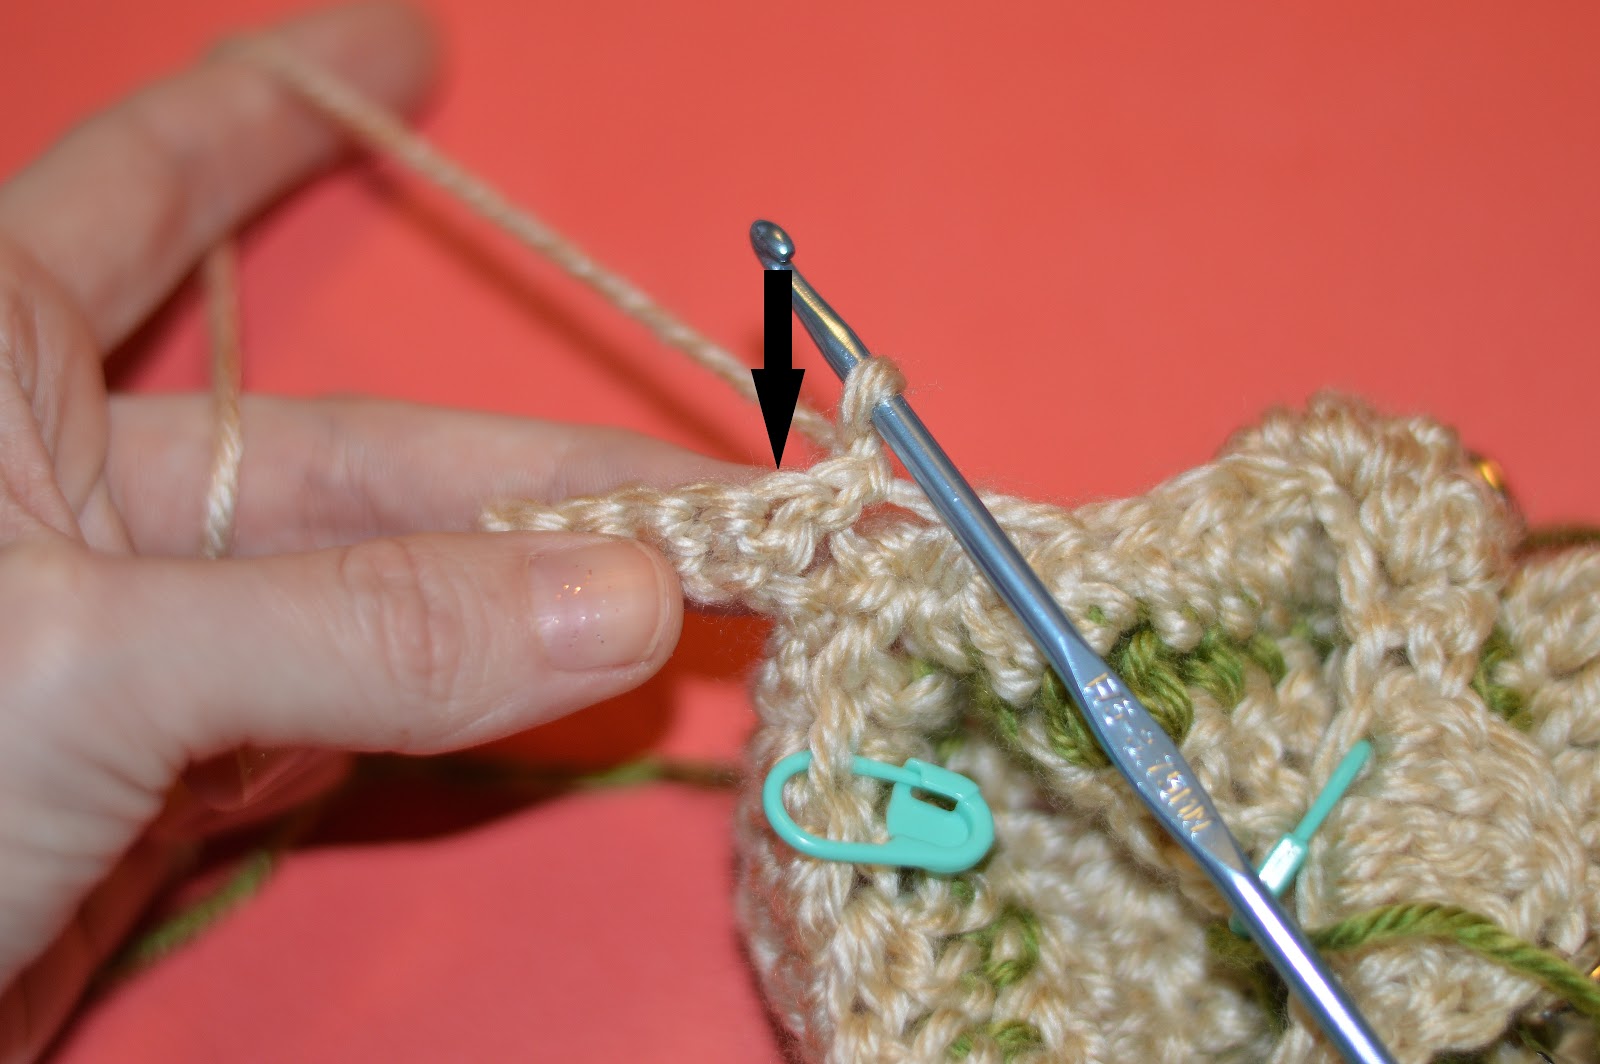
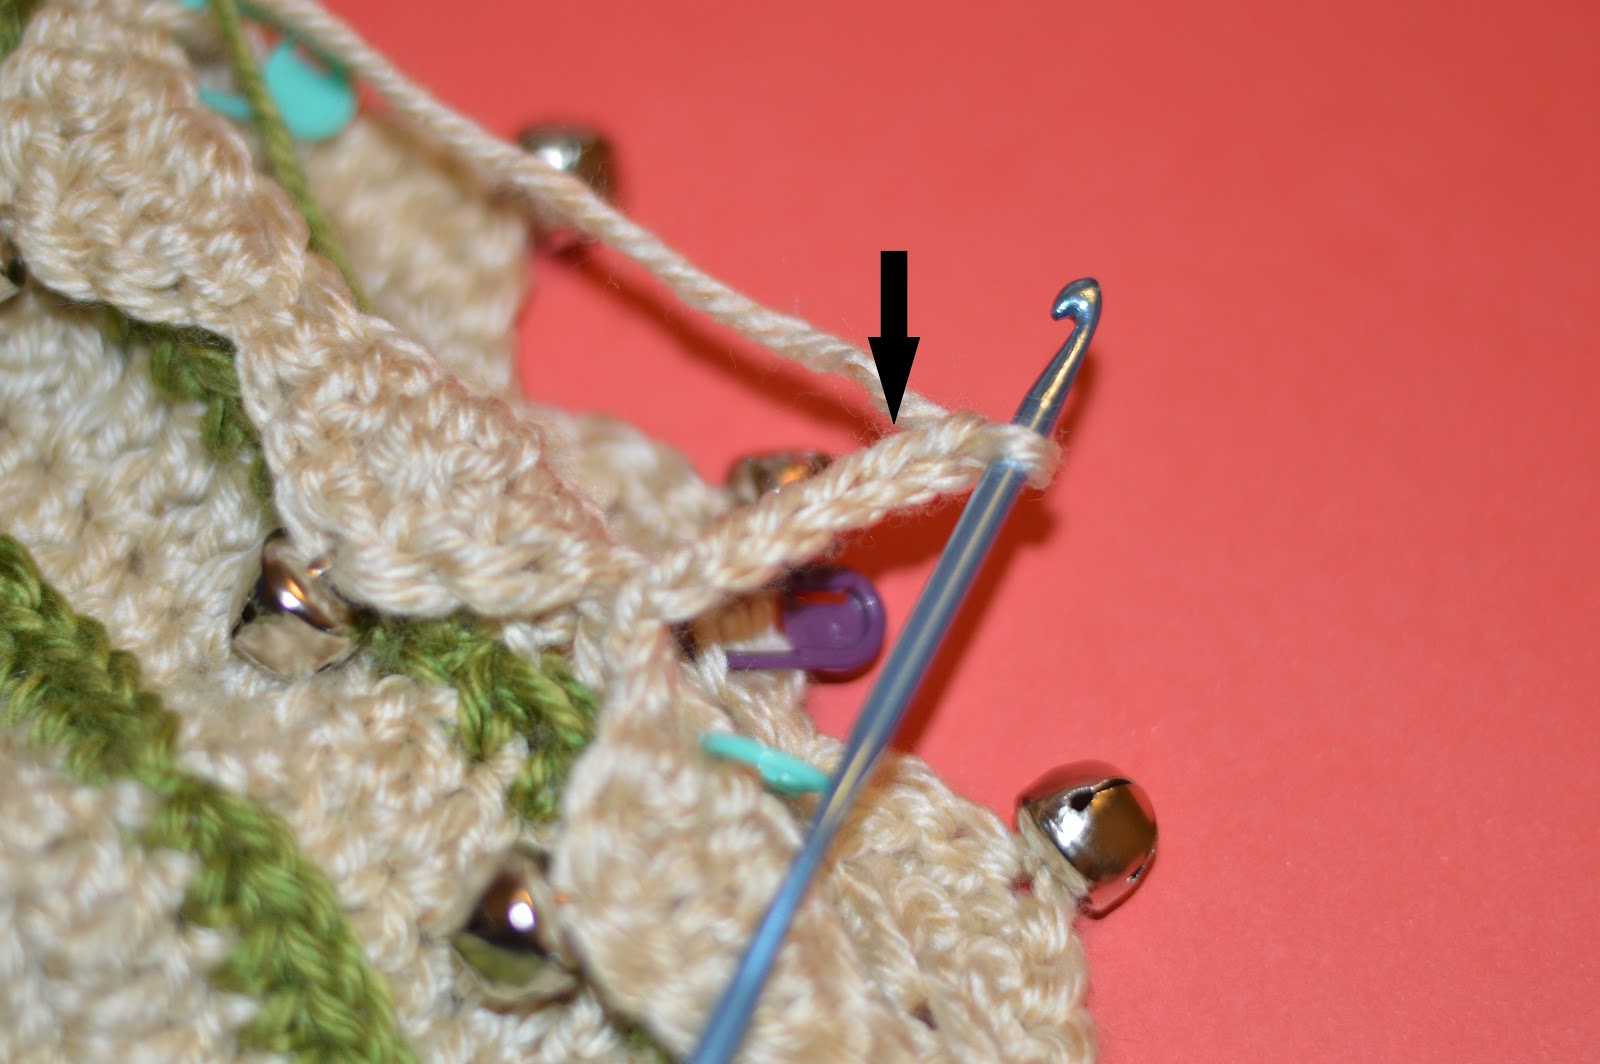
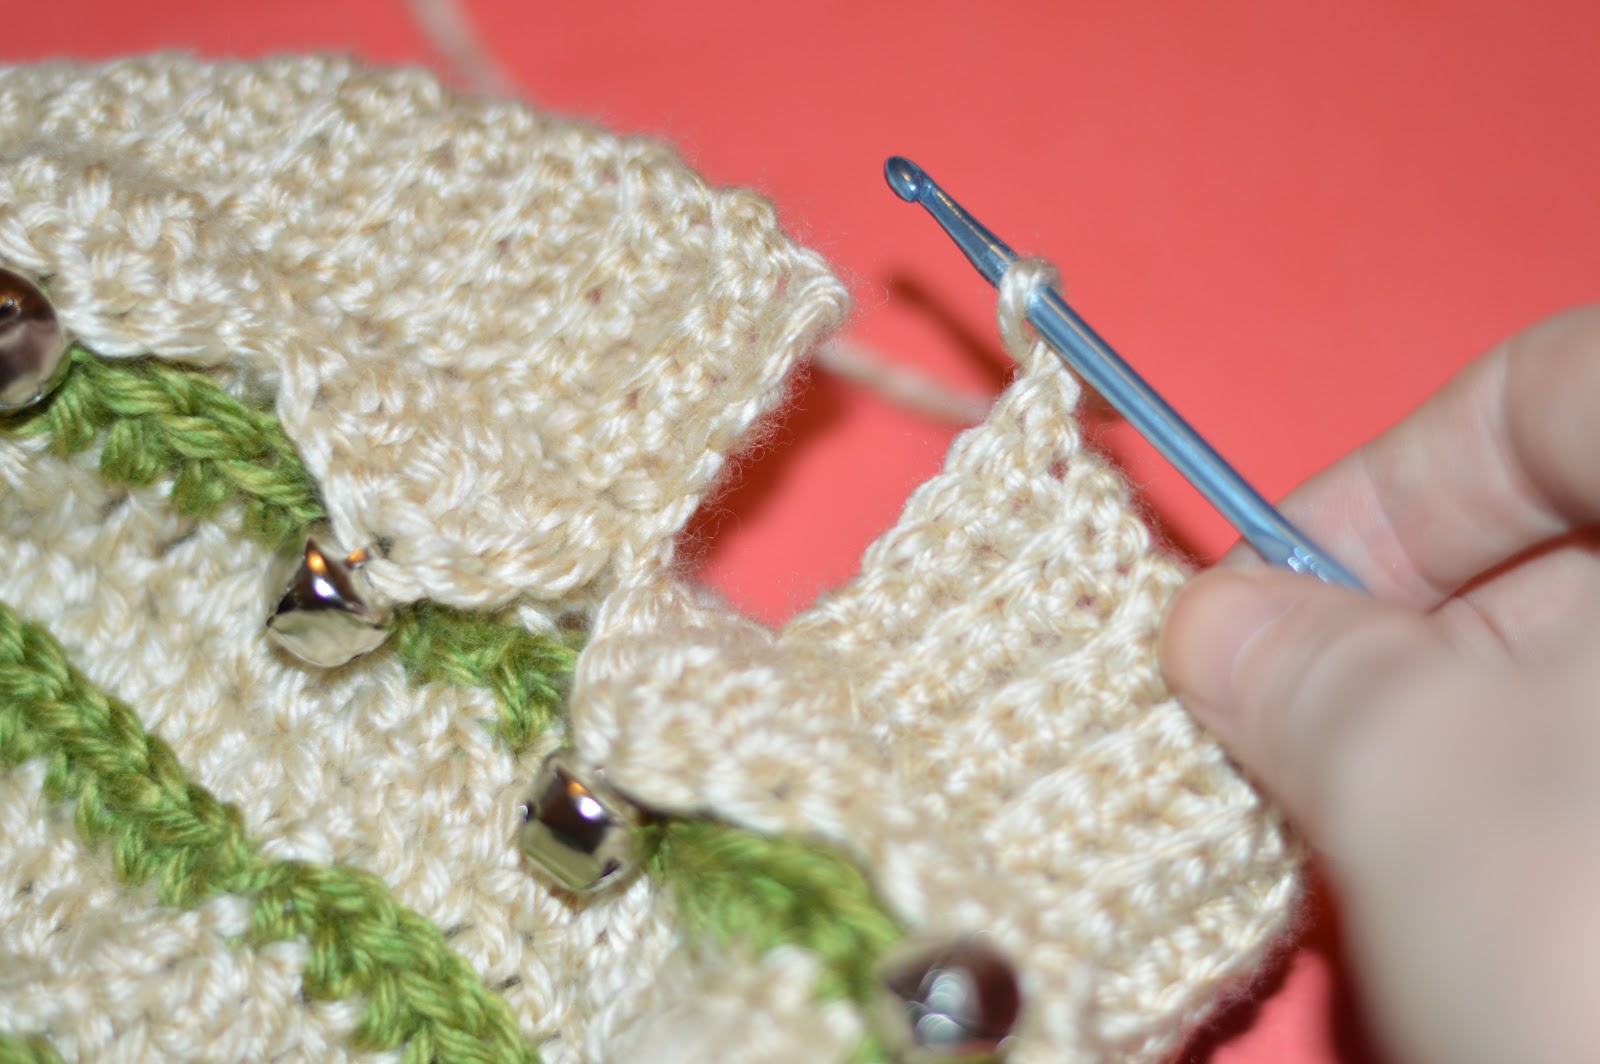
How To Attach the two sides of the brim together:
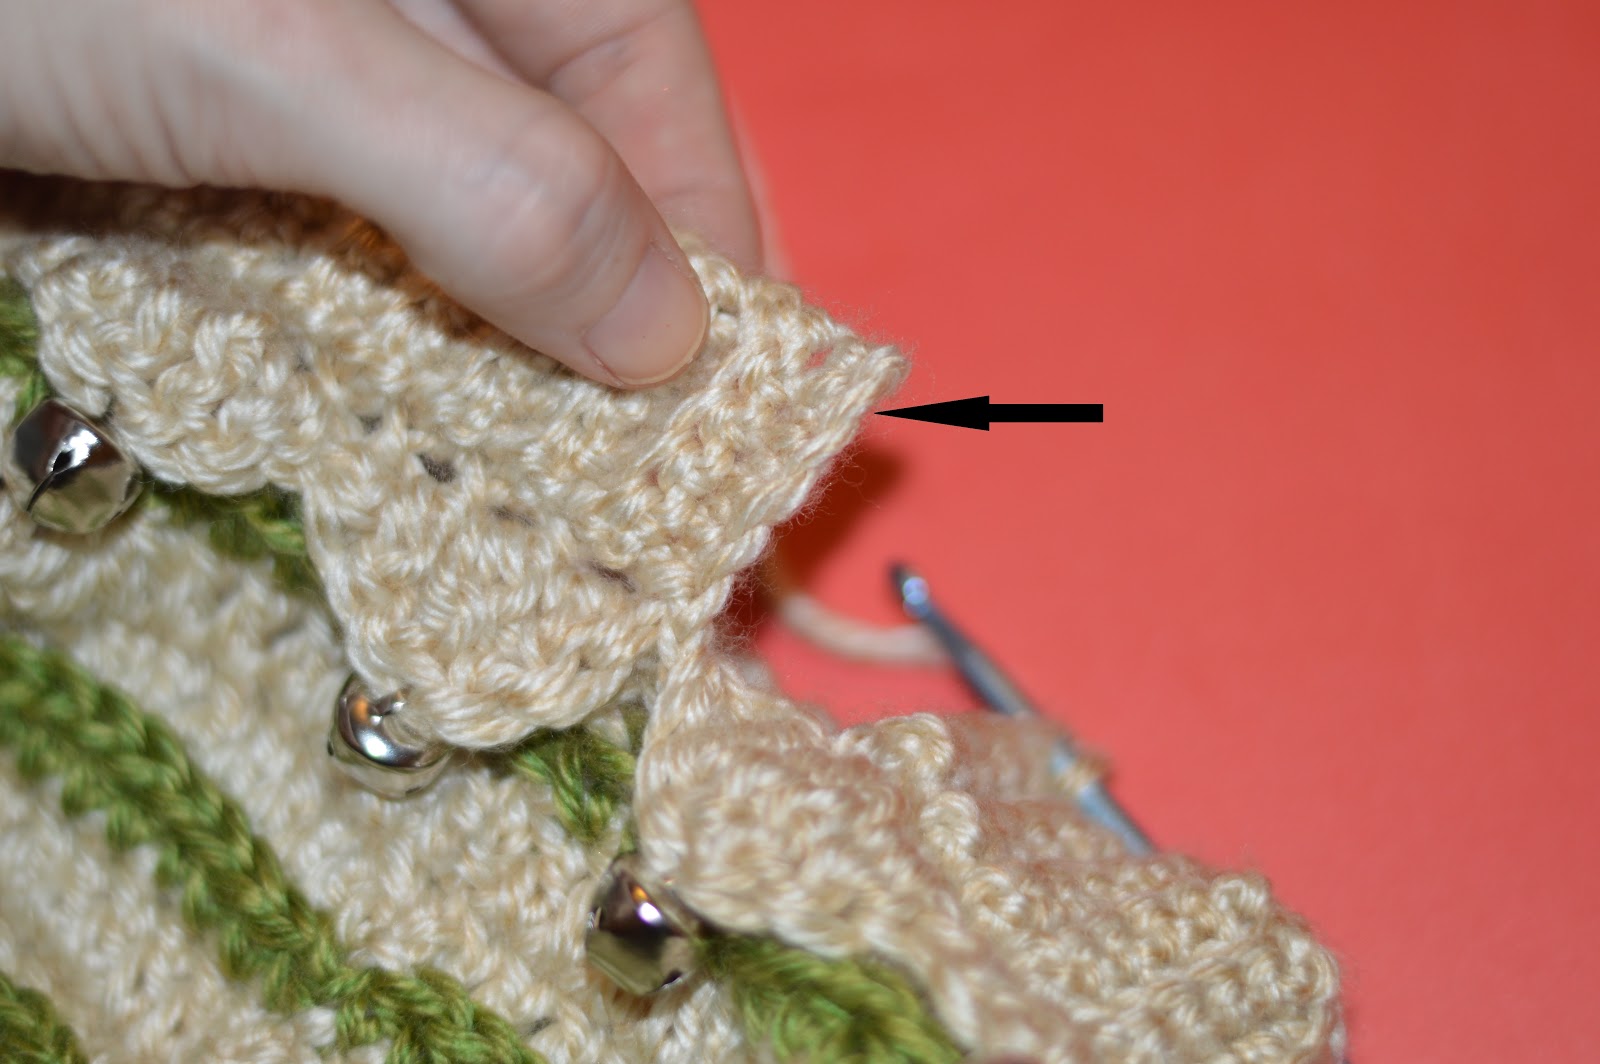
Take out the stitch marker, chain 1 and turn your work. Hold the two ends together and insert the hook into the FLO of the single crochet next to the hook,
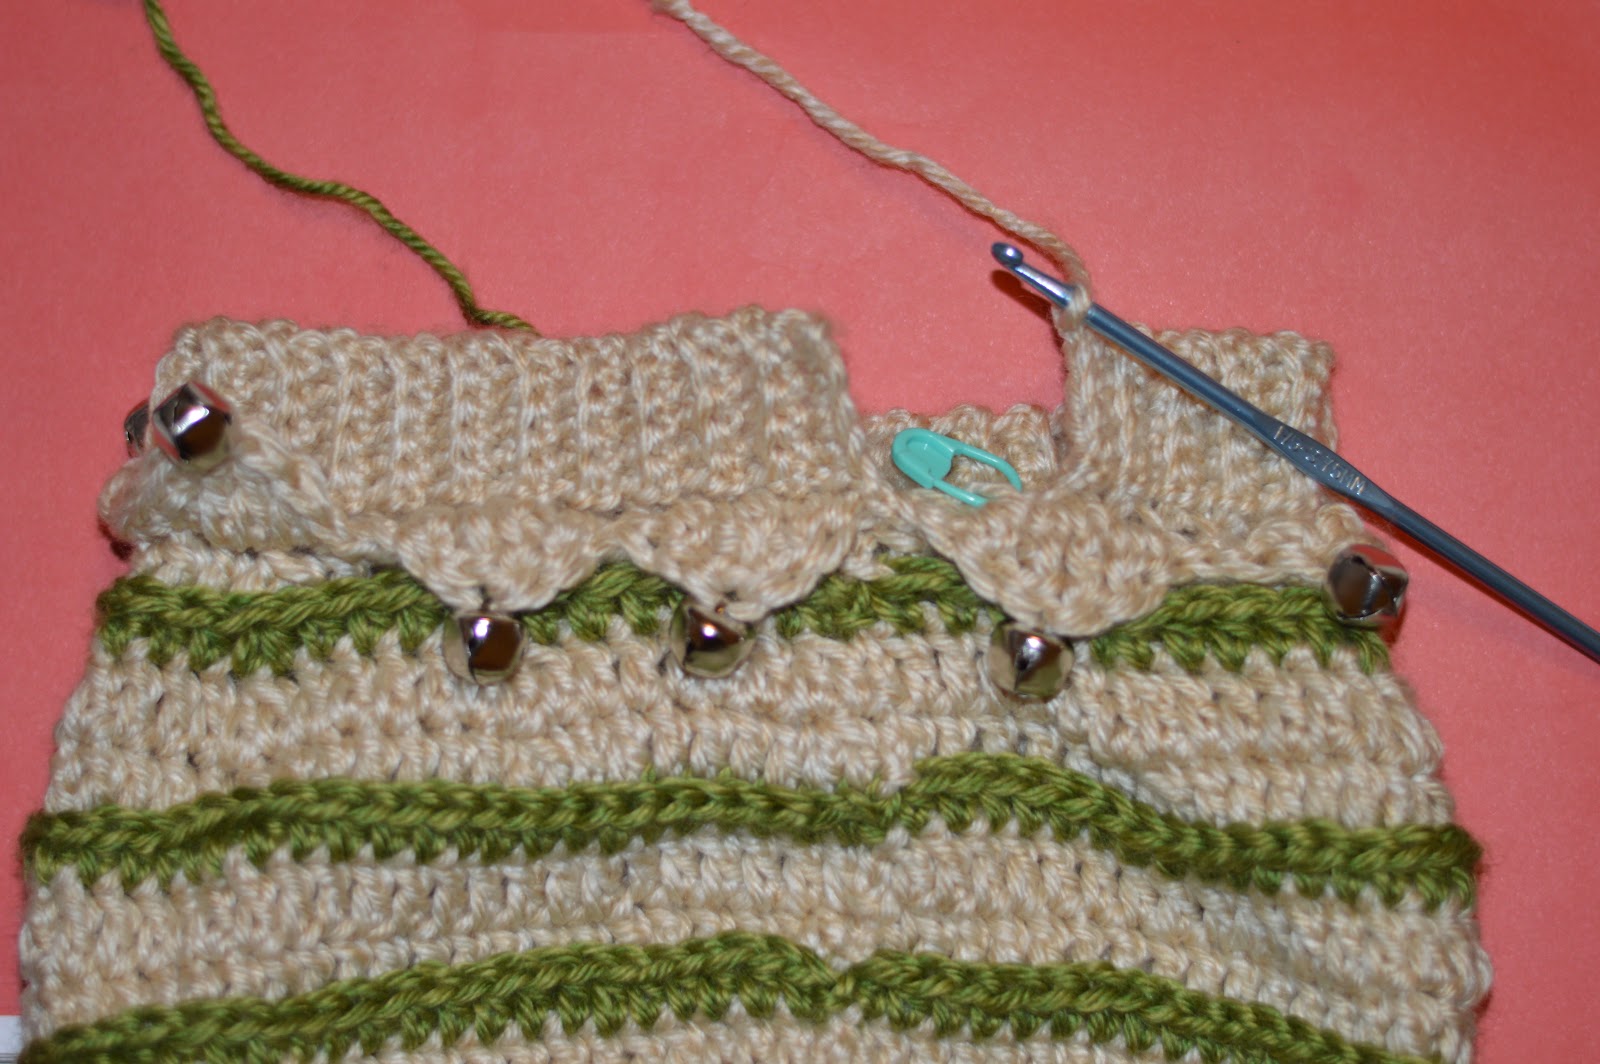

and insert the hook through the chain directly across, from the beginning of the brim. Make a slip stitch. Continue 4 more times.

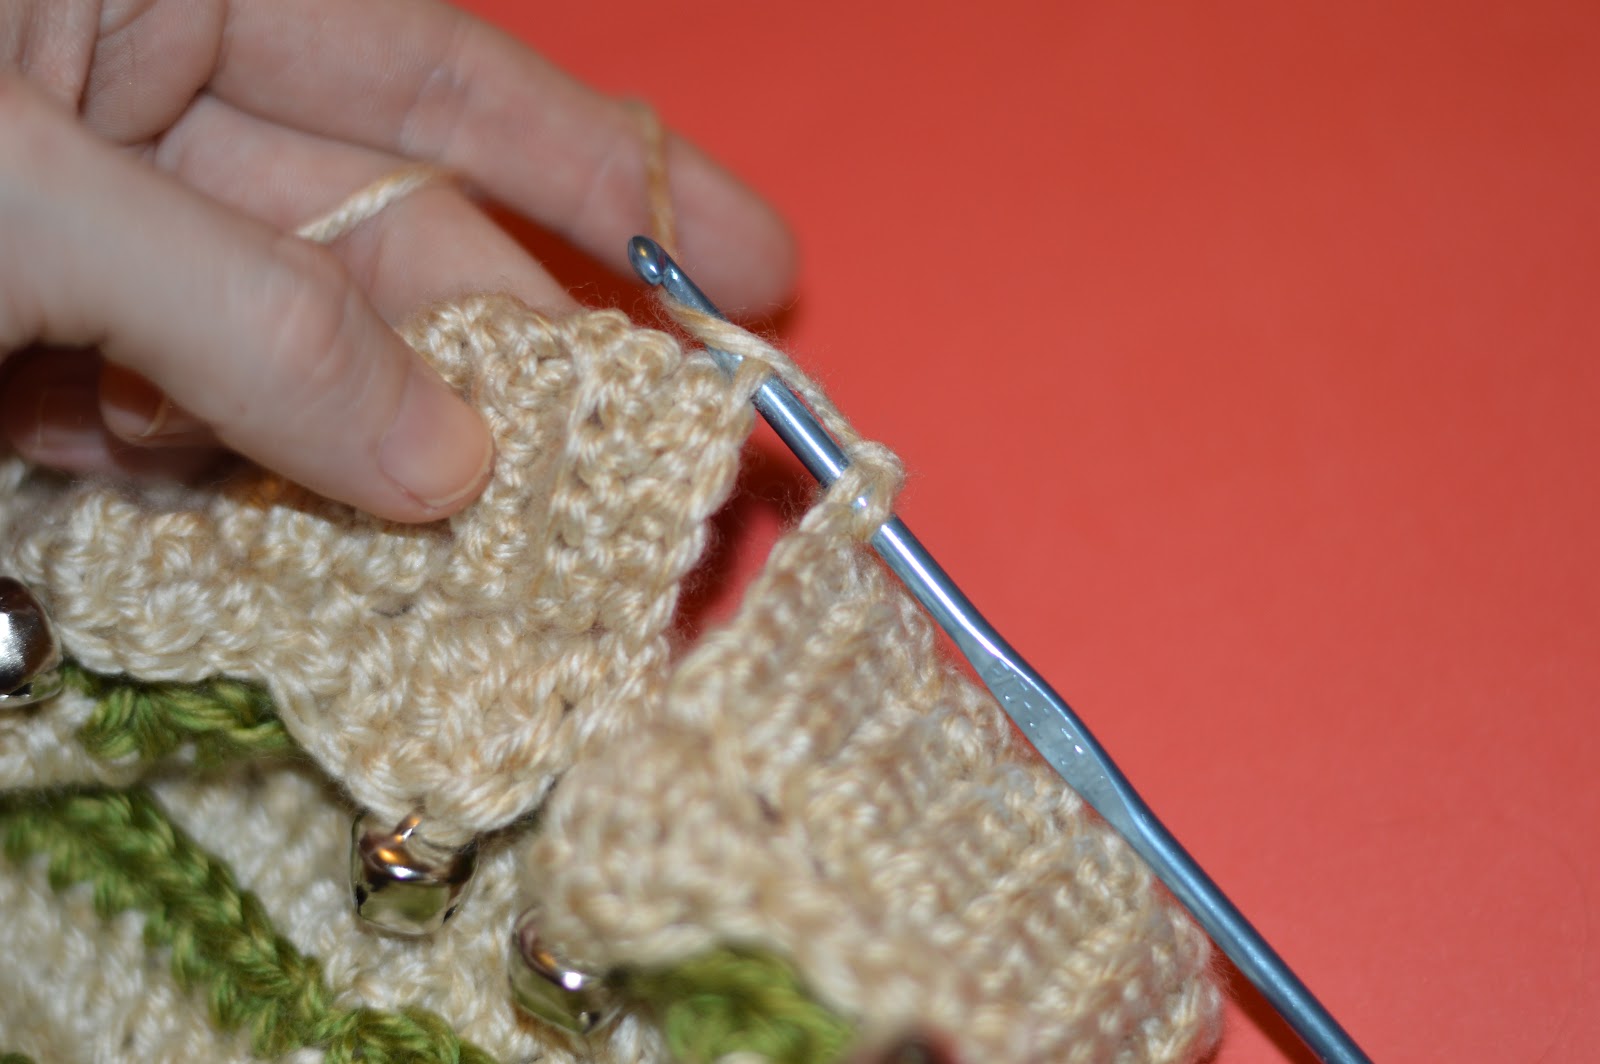
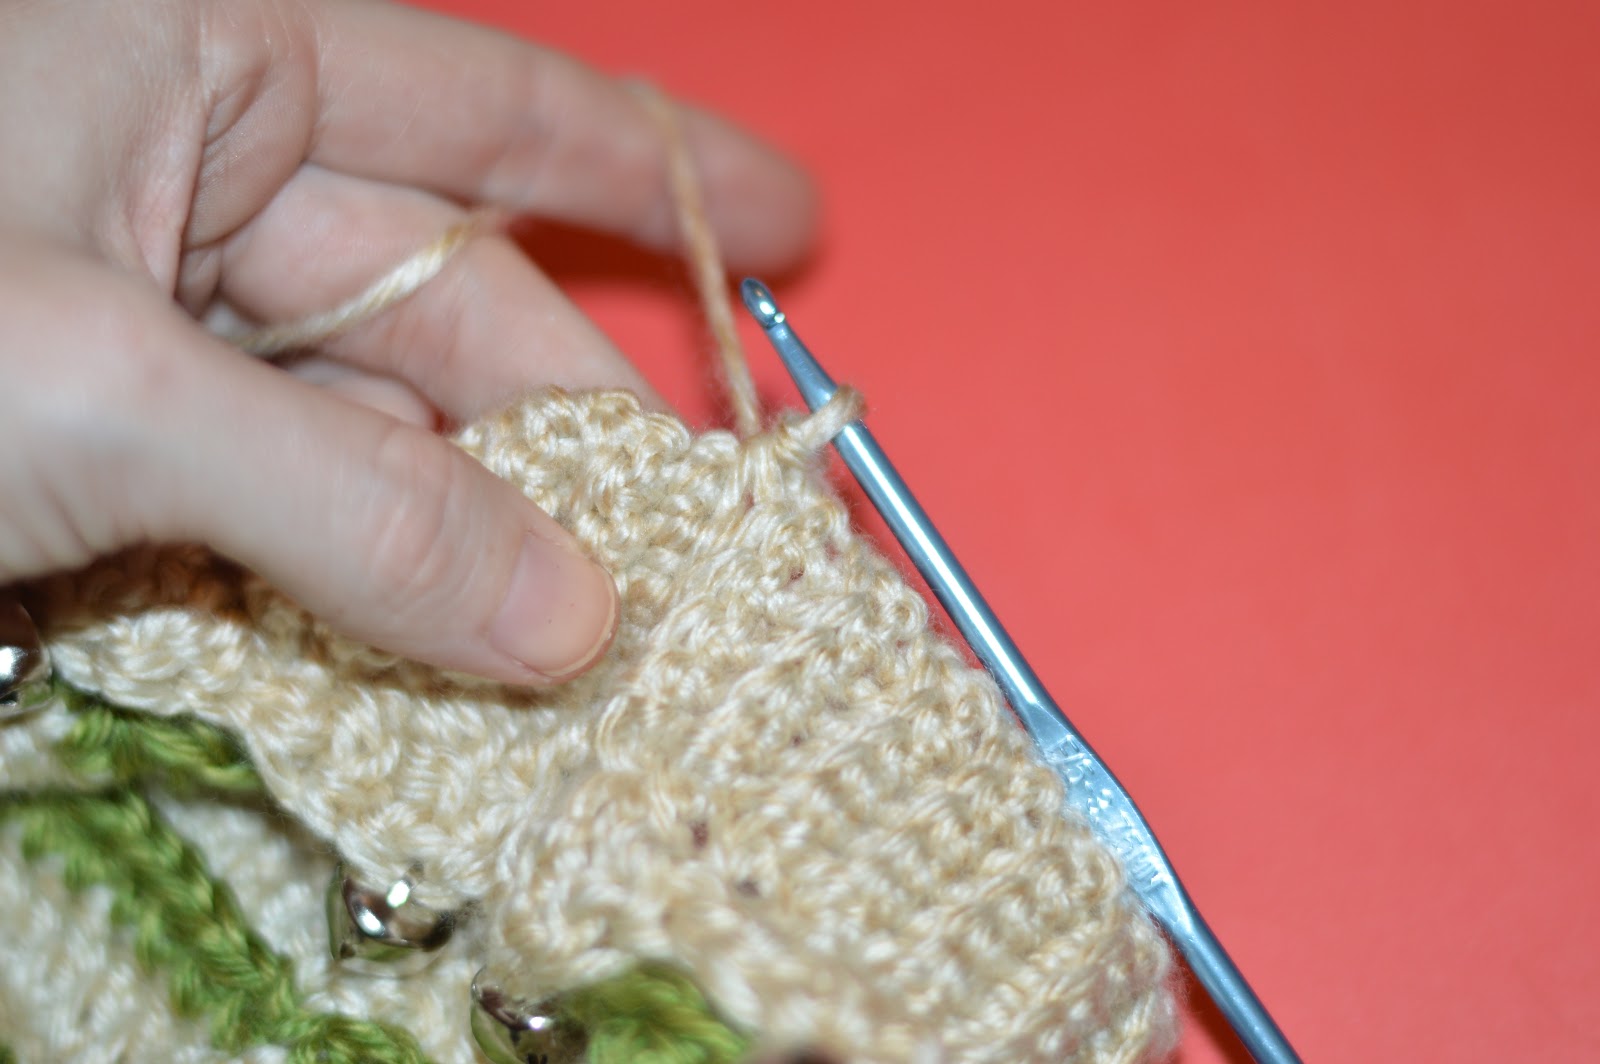
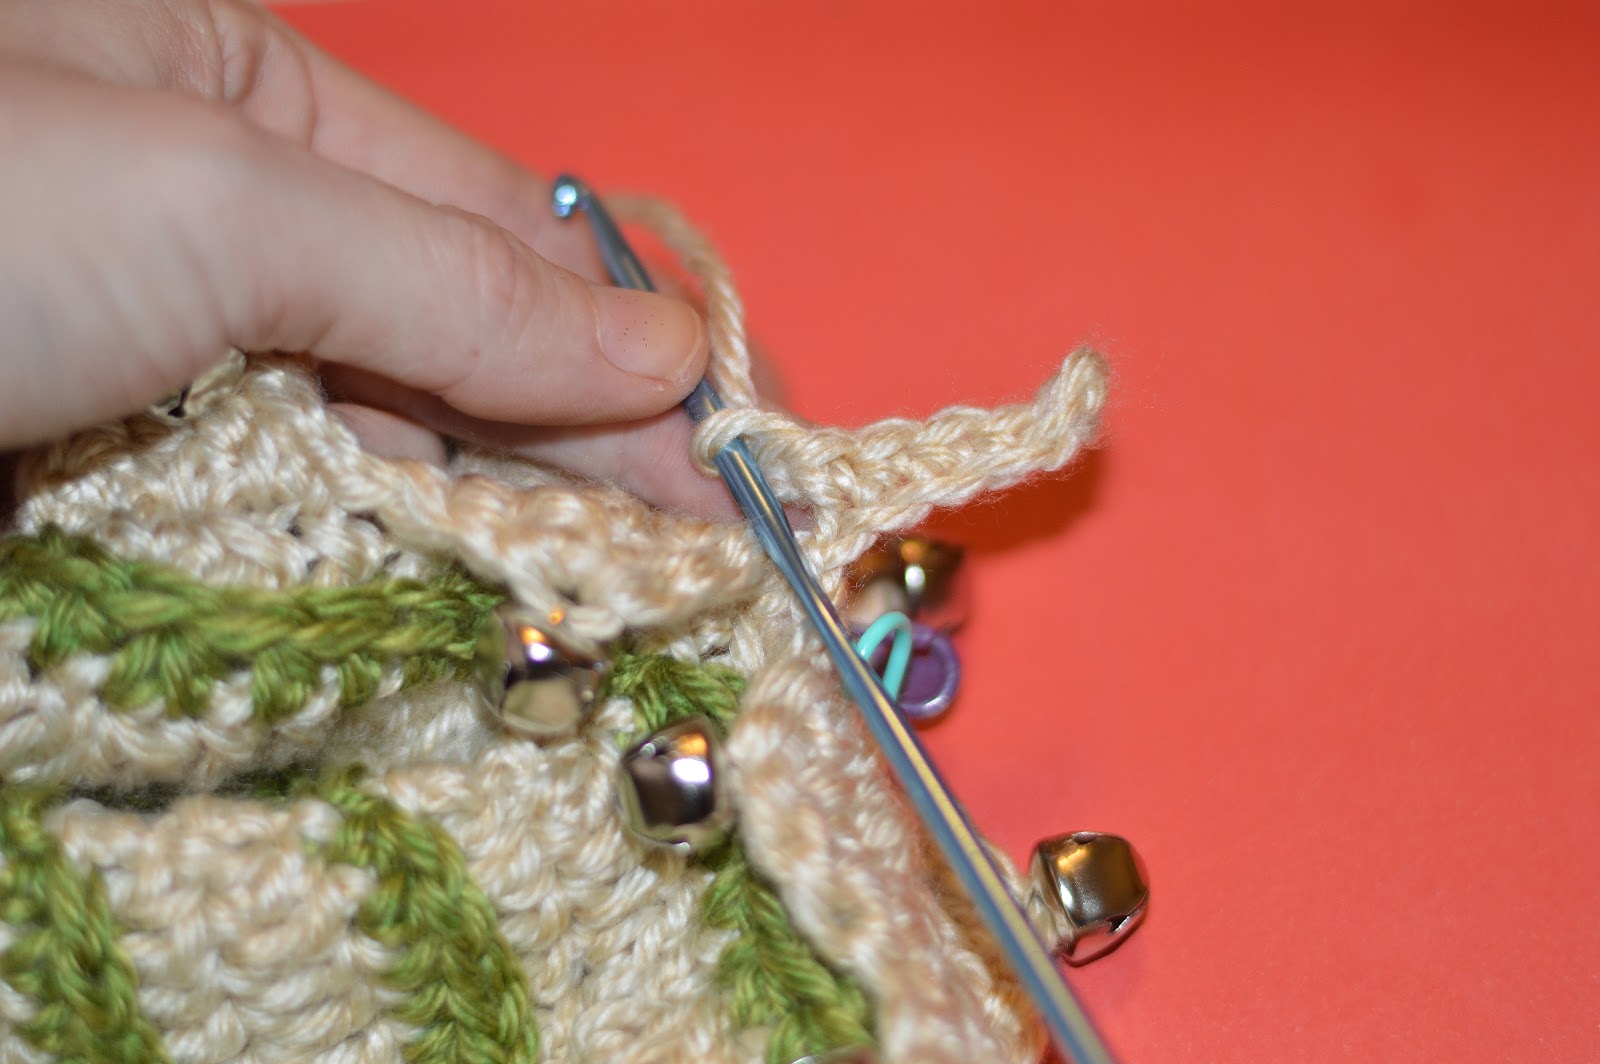
Insert the hook through the 2 remaining back loops from r32, keeping the hook at the front of the work. Make a slip stitch.


Cut the yarn, pull the tail end through and hide the tail and weave in all the ends.
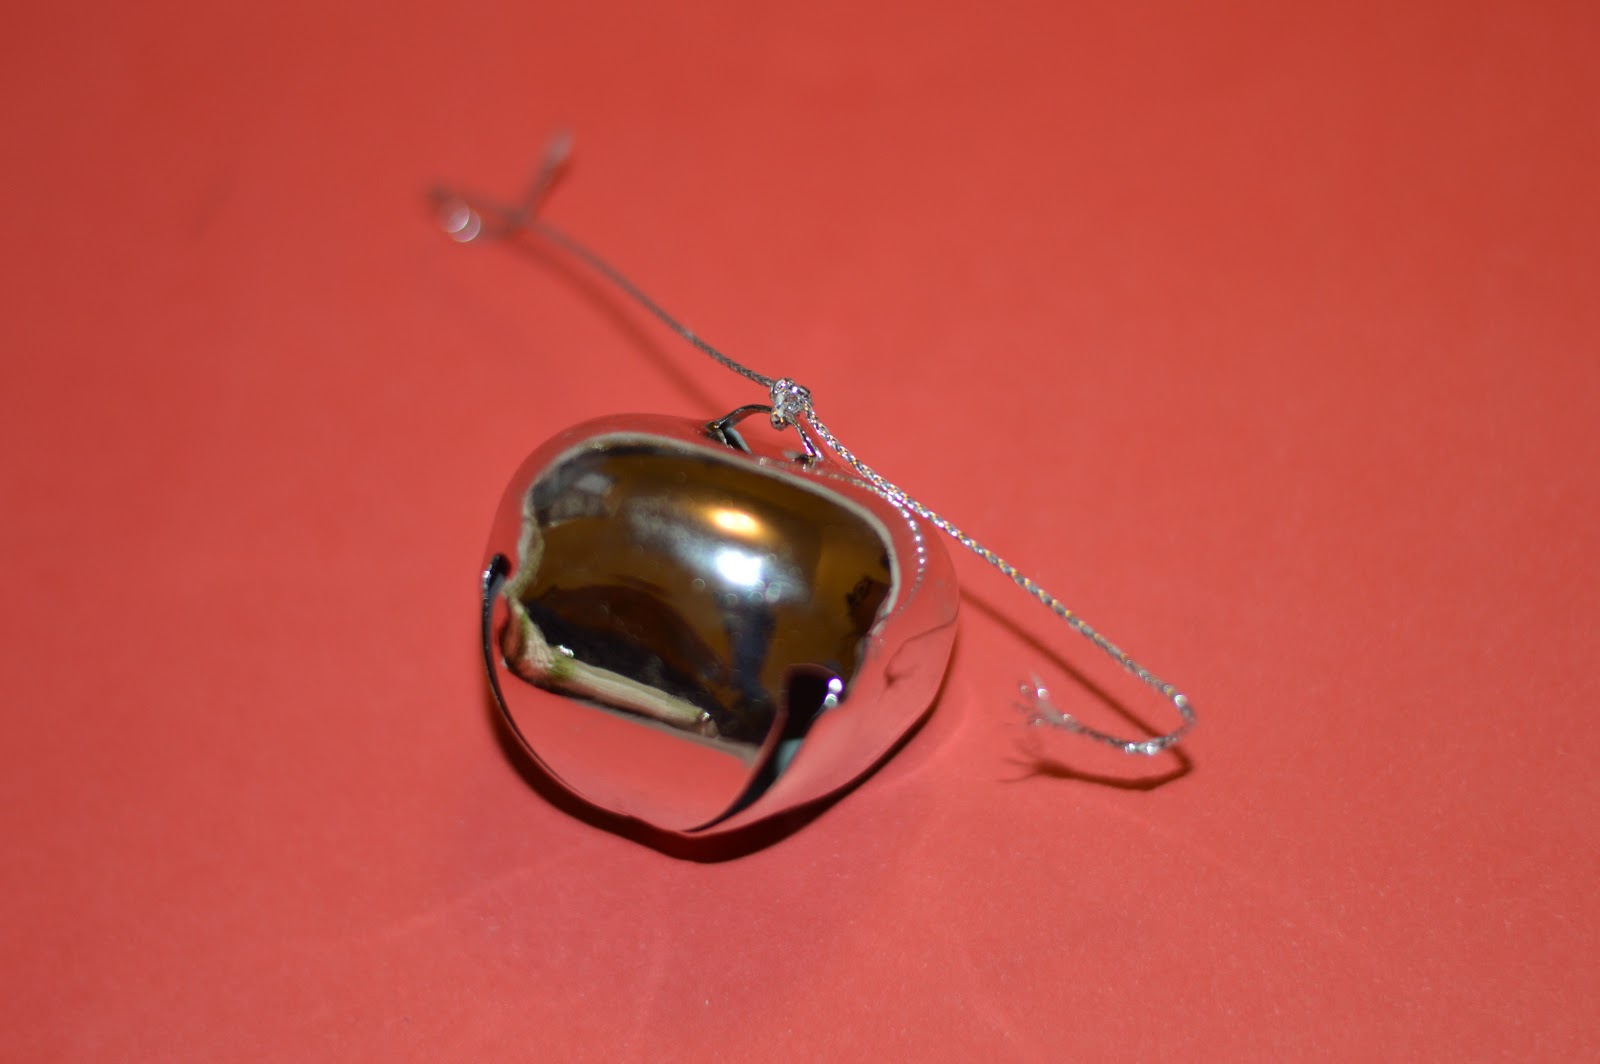
How to attach the 45mm jingle bell to the tail end of the hat:
I recommend using the tie that comes with the jingle bells. I tried replacing it with yarn
and the yarn broke because of the sharp edges on the eye of the jingle bell.
Untie the knot at the end of the tie and tie it in a knot to the jingle bell.
Thread one end of the tie through the eye of the needle and then thread the needle through one side of the tail end of the hat. Repeat with the other end of the tie and flip the hat inside out.


Secure the ties by threading the ties through the needle and then thread the needle through the tail end of the hat to the opposite side. Since the ties are so short, thread the needle through first, then thread the tie through the needle and then pull the needle through to the other side. Do this with both ties.
Tie the two ends together loosely, flip the hat right side out and check to see if the bell is in the right place. Flip the hat inside out and knot the ties multiple times.

You can weave in the ends of the ties or leave them loose.
THE PATTERN
Please read all of the abbreviations, instructions, tips and helpful information before beginning this pattern.
With G hook and main color:
R1: Make a loose slip knot or a magic circle and ch 2 (ch 2 does not count as a double crochet here and throughout the pattern.) Put 10 dc into the loose slip knot or the magic circle. Sl st to the first dc of the round. =10
*Diameter is approximately 1.25 inches*
R2: ch 2, dc in the same stitch and in each stitch around and make a cc to the contrasting color in the last stitch. Sl st to the first dc of the round. =10
R3: ch 1 (does not count as a hdc here and throughout the pattern.) 2hdc in the same stitch, hdc in the next stitch. *2hdc in the next stitch, hdc in the next stitch.* Repeat from the star around and make a cc to the main color in the last stitch. Sl st through the chain and the 3rd back loop of the first hdc of the round. =15
*Circumference is approximately 3.5 inches*
R4: ch 2, dc in the same stitch in the 3rd loop and in each stitch around in
the 3rd loop. Sl st to the first dc of the round. =15
R5: ch 2, dc in the same stitch and in each stitch around and make a cc to the contrasting color in the last stitch. Sl st to the first dc of the round. =15
R6: ch 1, 2hdc in the same stitch, hdc in the next 2 stitches. *2hdc in the next stitch, hdc in the next 2 stitches.* Repeat from the star around and make a cc to the main color in the last stitch. Sl st through the chain and the 3rd loop of the first hdc of the round. =20
*Circumference is approximately 5 inches*
R7: ch 2, dc in the same stitch in the 3rd loop and in each stitch around in the 3rd loop. Sl st to the first dc of the round. =20
R8: ch 2, dc in the same stitch and in each stitch around and make a cc to the contrasting color in the last stitch. Sl st to the first dc of the round. =20
R9: ch 1, 2 hdc in the same stitch, hdc in the next 3 stitches. *2hdc in the next stitch, hdc in the next 3 stitches.* Repeat from the star around and make a cc to the main color in the last stitch. Sl st through the chain and the 3rd loop of the first hdc of the round. =25
*Circumference is approximately 6 inches*
R10: ch 2, dc in the same stitch in the 3rd loop and in each stitch around in the 3rd loop. Sl st to the first dc of the round. =25
R11: ch 2, dc in the same stitch and in each stitch around and make a cc to the contrasting color in the last stitch. Sl st to the first dc of the round. =25
R12: ch 1, 2 hdc in the same stitch, hdc in the next 4 stitches. *2hdc in the next stitch, hdc in the next 4 stitches.* Repeat from the star around and make a cc to the main color in the last stitch. Sl st through the chain and the 3rd loop of the first hdc of the round. =30
*Circumference is approximately 7.5 inches*
R13: ch 2, dc in the same stitch in the 3rd loop and in each stitch around in the 3rd loop. Sl st to the first dc of the round. =30
R14: ch 2, 2dc in the same stitch, dc in the next stitch. *2dc in the next stitch, dc in the next stitch.* Repeat from the star around and in the last stitch make a cc to the contrasting color. Sl st to the first dc of the round. =45
*Circumference is approximately 10 inches*
R15: ch 1, hdc in the same stitch and in each stitch around. Make a cc to the main color in the last stitch. Sl st through the chain and the 3rd loop of the first hdc of the round. =45
R16: ch 2, 2dc in the same stitch in the 3rd loop , dc in the next 2 stitches in the 3rd loop . *2dc in the next stitch in the 3rd loop, dc in the next 2 stitches in the 3rd loop.* Repeat from the star around and in the last stitch make a cc to the contrasting color. Sl st to the first dc of the round. =60
*Circumference is approximately 14 inches*
R17: ch 2, dc in the same stitch and in each stitch around. Make a cc to the contrasting color in the last stitch. Sl st to the first dc of the round. =60
R18: ch 1, 2 hdc in the same stitch, hdc in the next 5 stitches. *2hdc in the next stitch, hdc in the next 5 stitches.* Repeat from the star around and make a cc to the main color in the last stitch. Sl st through the chain and the 3rd loop of the first hdc of the round. =70
*Circumference is approximately 18.5 inches*
R19: ch 2, dc in the same stitch in the 3rd loop and in each stitch around in the 3rd loop. Sl st to the first dc of the round. =70
R20: ch 2, 2dc in the same stitch, dc in the next 6 stitches. *2dc in the next stitch, dc in the next 6 stitches.* Repeat from the star around and in the last stitch make a cc to the contrasting color. Sl st to the first dc of the round. =80
*Circumference is approximately 20 inches.*
R21: : ch 1, hdc in the same stitch and in each stitch around. Make a cc to the main color
in the last stitch. Sl st through the chain and the 3rd loop of the first hdc of the round. =80
R22: ch 2, dc in the same stitch in the 3rd loop and in each stitch around in the 3rd loop. Sl st to the first dc of the round. =80
R23: ch 2, dc in the same stitch and in each stitch around. Make a cc to the contrasting
color in the last stitch. Sl st to the first dc of the round. =80
R24: Repeat R21
R25: Repeat R22
R26: Repeat R23
R27: Repeat R21
R28: ch 2, dc2tog starting in the same stitch in the 3rd loop, dc in the next 6 stitches in the 3rd loop. *dc2tog in the 3rd loop, dc in the next 6 stitches in the 3rd loop.* Repeat from the star around. Sl st to the first dc of the round. =70
*Circumference is approximately 20 inches*
R29: ch 2, dc2tog starting in the same stitch, dc in the next 5 stitches. *dc2tog, dc in the next 5 stitches.* Repeat from the star around and make a cc to the contrasting color in the last stitch.
Sl st to the first dc of the round. =60
*Circumference is approximately 19 inches*
R30: ch 2, hdc2tog starting in the same stitch, hdc in the next 4 stitches. *hdc2tog, hdc in
the next 4 stitches.* Repeat from the star around a make a cc to the main color in the last stitch. Sl st through the chain and the 3rd loop of the first hdc of the round. =50
*Circumference is approximately 18 inches*
R31: ch 2, dc2tog starting in the same stitch in the 3rd loop, dc in the next 3 stitches in
the 3rd loop. *dc2tog in the 3rd loop, dc in the next 3 stitches in the 3rd loop.* Repeat from the star around. Sl st to the first dc of the round. =40
*Circumference is approximately 14 inches*
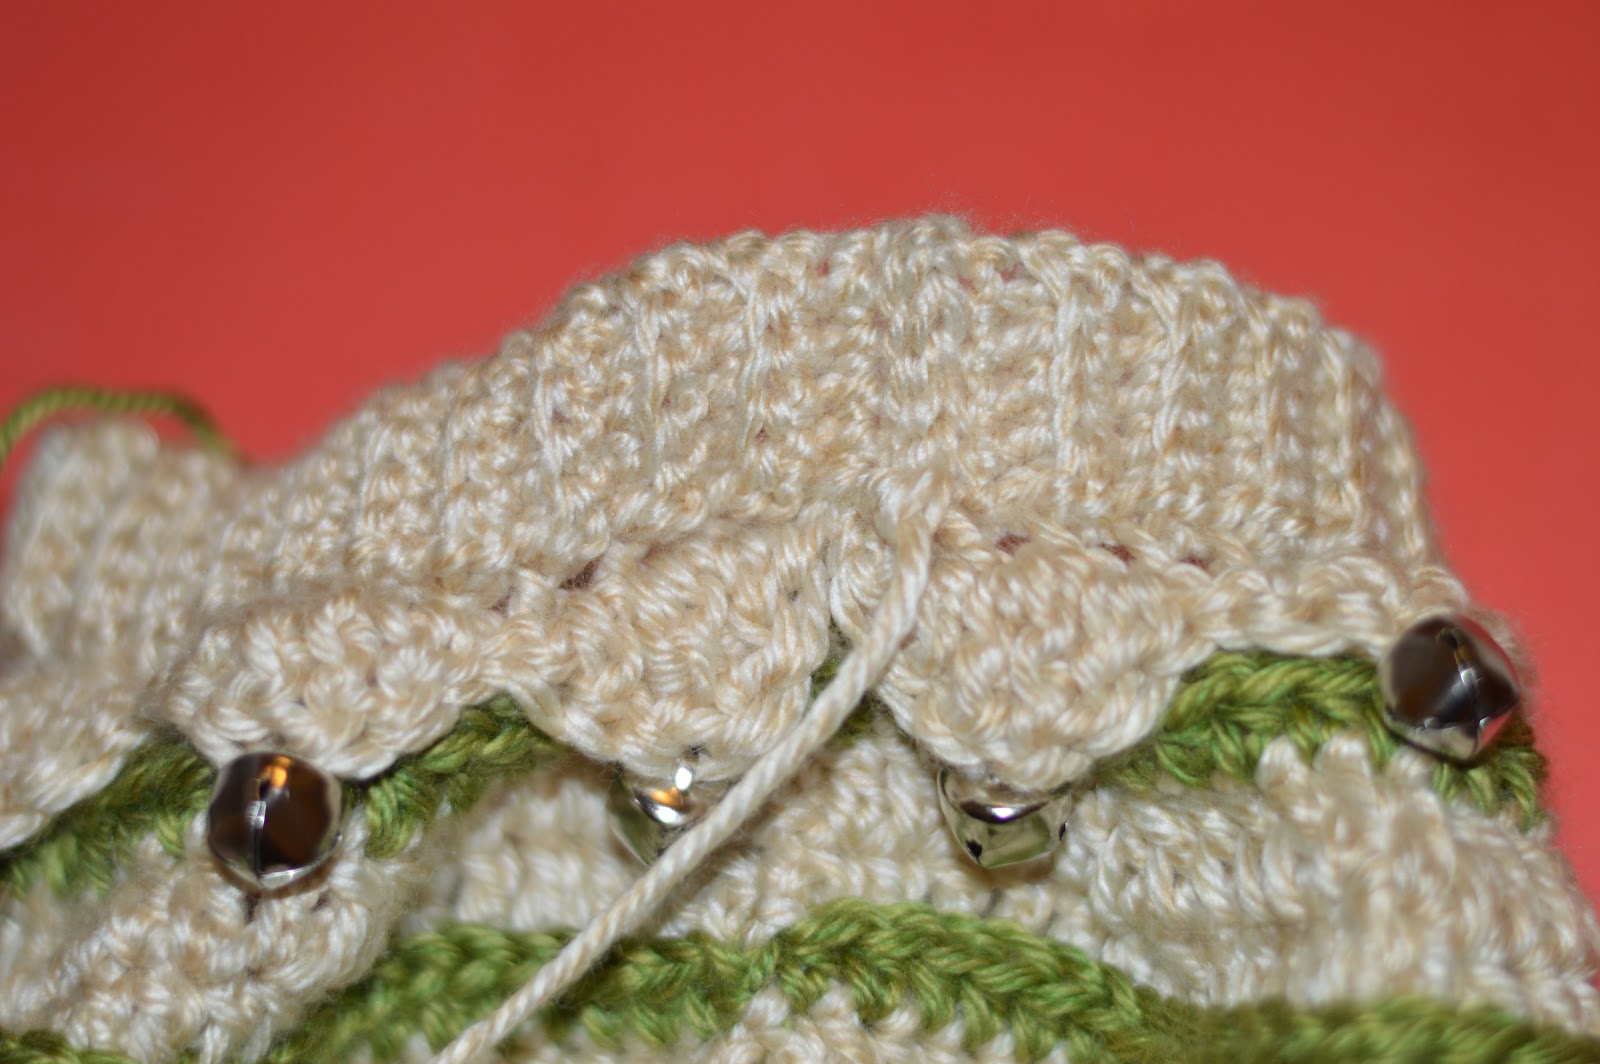
R32: Working in the FLO: ch 1, sc and dc in the same stitch, tc in the next stitch, add the 15mm jingle bell, tc in the same stitch, dc and sc in the next stitch, sl st in the next stitch. *sc and dc in the next stitch, tc in the next stitch, add the 15mm jingle bell, tc in the same stitch, dc and sc in the next stitch, sl st in the next stitch.* Repeat from the star around. Sl st to the ch 1.
*Do not cut the yarn.*
THE BRIM OF THE HAT
With F hook and main color:
R1: ch 6, starting in the second ch from the hook, sc across 5 times. Sl st to the back loop of R32. =5
R2: ch 1 and turn your work. Working in the BLO, sc in each sc across. =5
R3: ch 1 and turn your work. Working in the BLO, sc in each sc across. Sl st to the back loop of R32. =5
R4: Repeat R2
R5: Repeat R3
R6: Repeat R2
R7: Repeat R3
R8: Repeat R2
R9: Repeat R3. Sl st to the next 2 back loops of R32. =5
Repeat R2 and R3, and as you get to each stitch marker, slst2tog. End on a R2 when you have 2 back loops remaining.
Take out the stitch marker, ch 1, turn your work. Hold the 2 ends together and slip stitch across, 5 times.
Slst2tog with the 2 remaining back loops.
Cut the yarn, pull the tail end of the yarn through and and weave in all the ends.
*The circumference of the hat should measure 16 inches.*
Add the 45mm jingle bell, yarn puff ball or a furry pompom to the tail end of the hat.
The End!
If you make any Jingle The Elf Hats, I would love to see!
Email me at withalexofficial@gmail.com for any questions or comments about this pattern.
Copyright ©2016 Alexandra Halsey
You may sell any finished items, but I do request that you put a link back to my pattern and credit Alexandra Halsey for the original design under the Creative Commons Attribution Share Alike license. Do not copy, share, download or publicly display this pattern without permission, and no video tutorials may be made using this pattern.
I hope ya'll are having a wonderful day!
Soft hugs and Never Give Up!
