

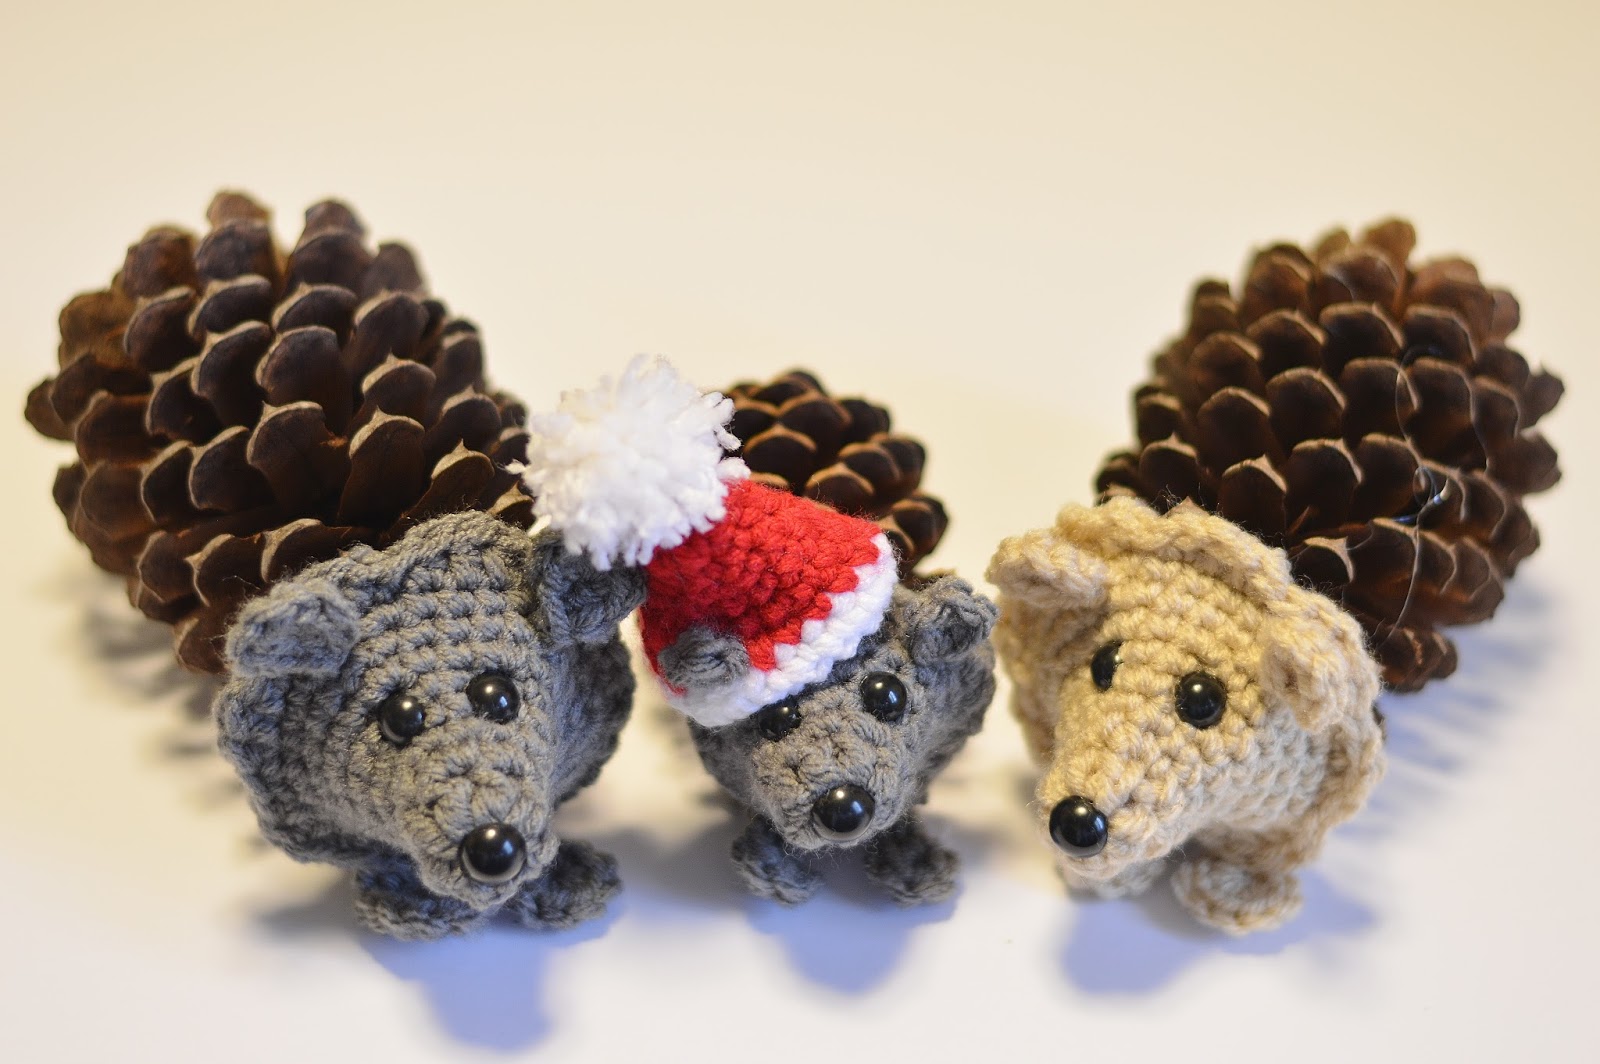
Hello! I love hedgehogs! I think that they are so adorable and I love all the little hedgehog, amigurumi, hats, mittens etc that I've been seeing on facebook, instagram, and pinterest. I even saw some pine cone hedgehogs but they were made from felt, so I decided to create one that was crocheted, and I love how they have been turning out. I crocheted myself a little family of hedgehogs and I even crocheted the little one a Santa hat.
For the video tutorial and written pattern, scroll down.

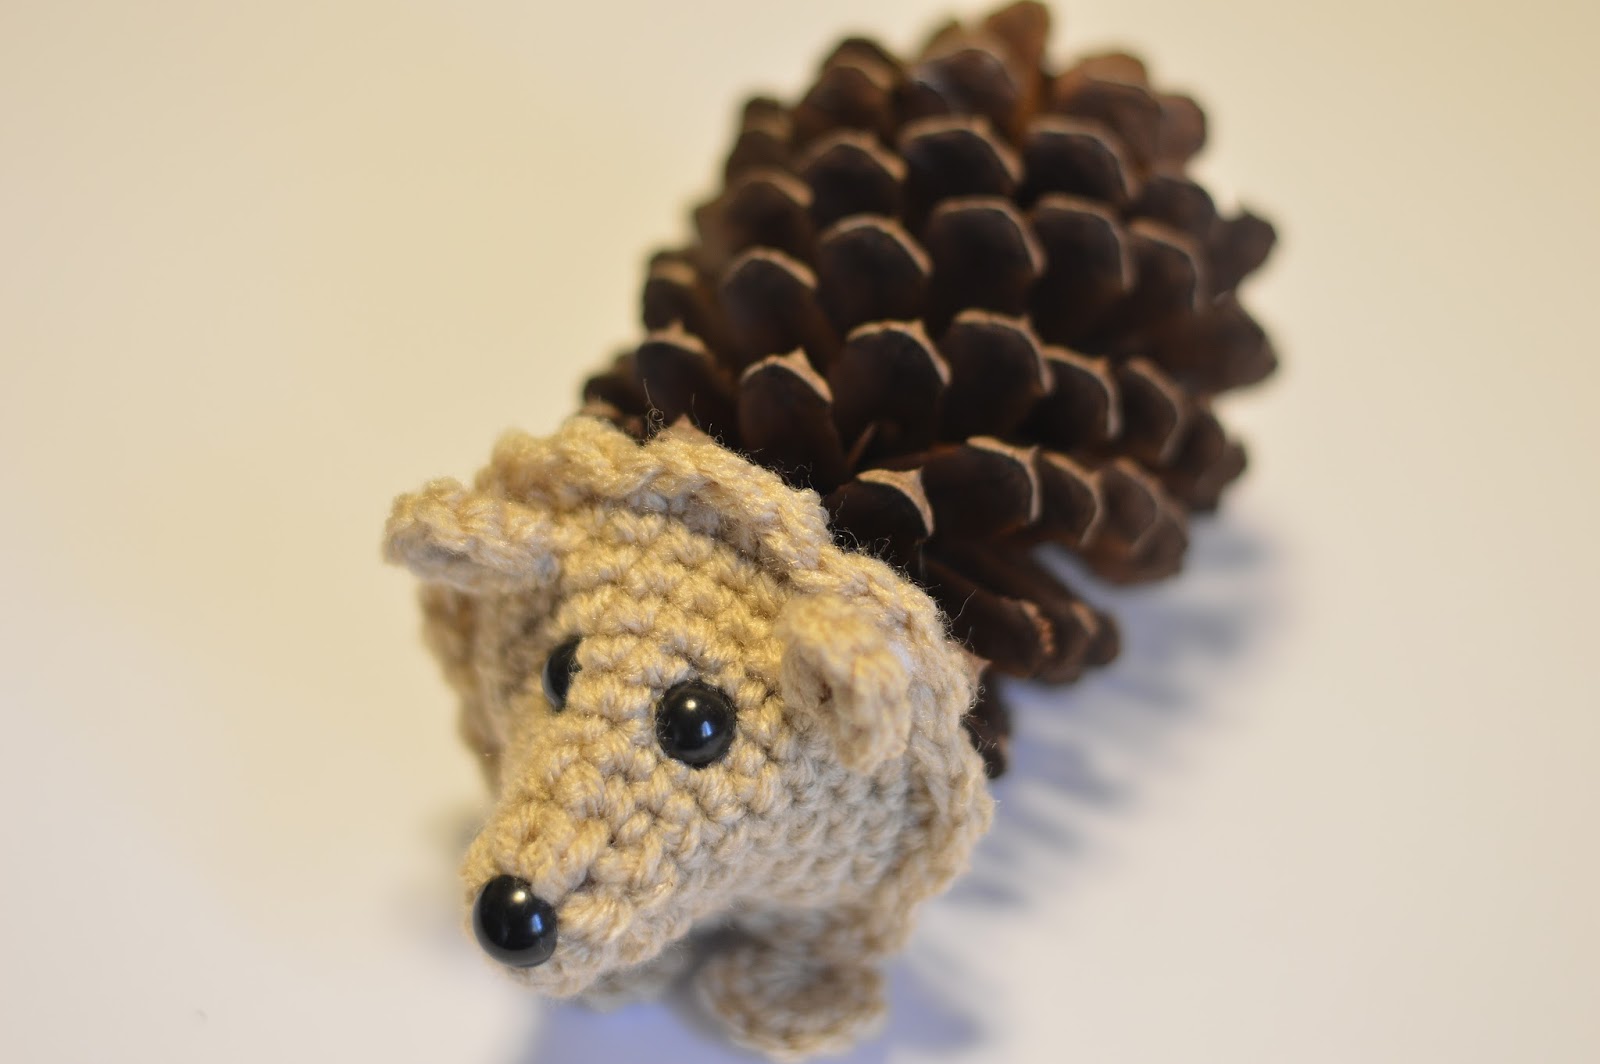
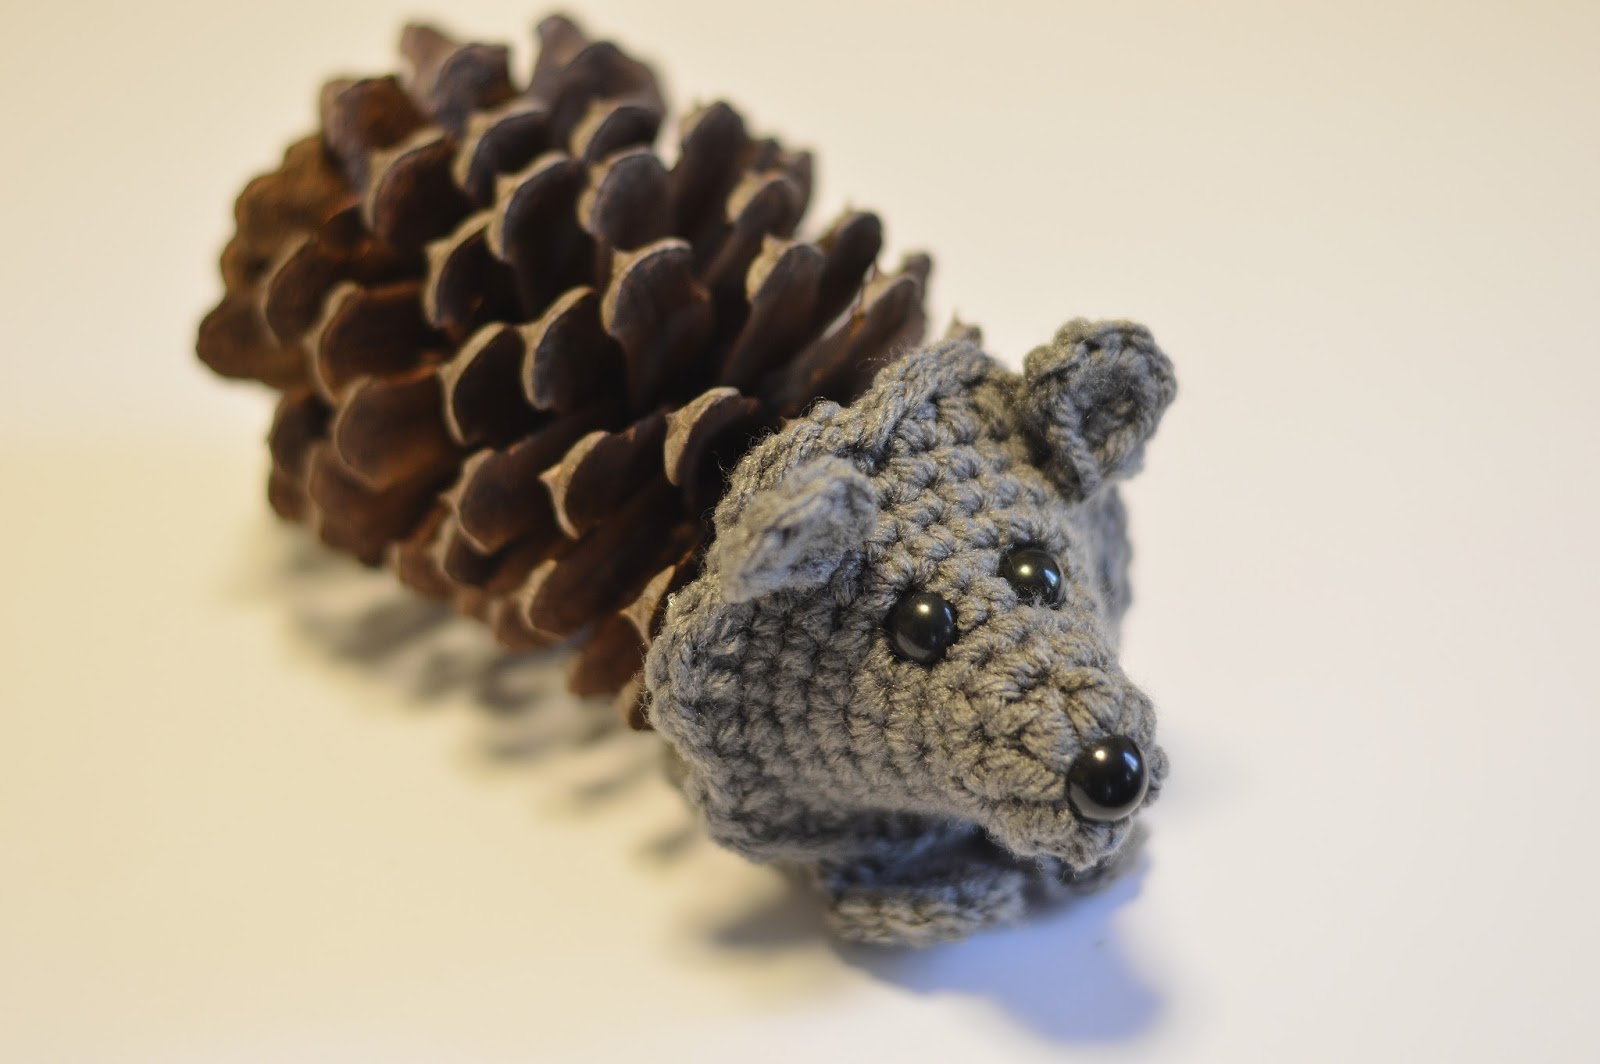
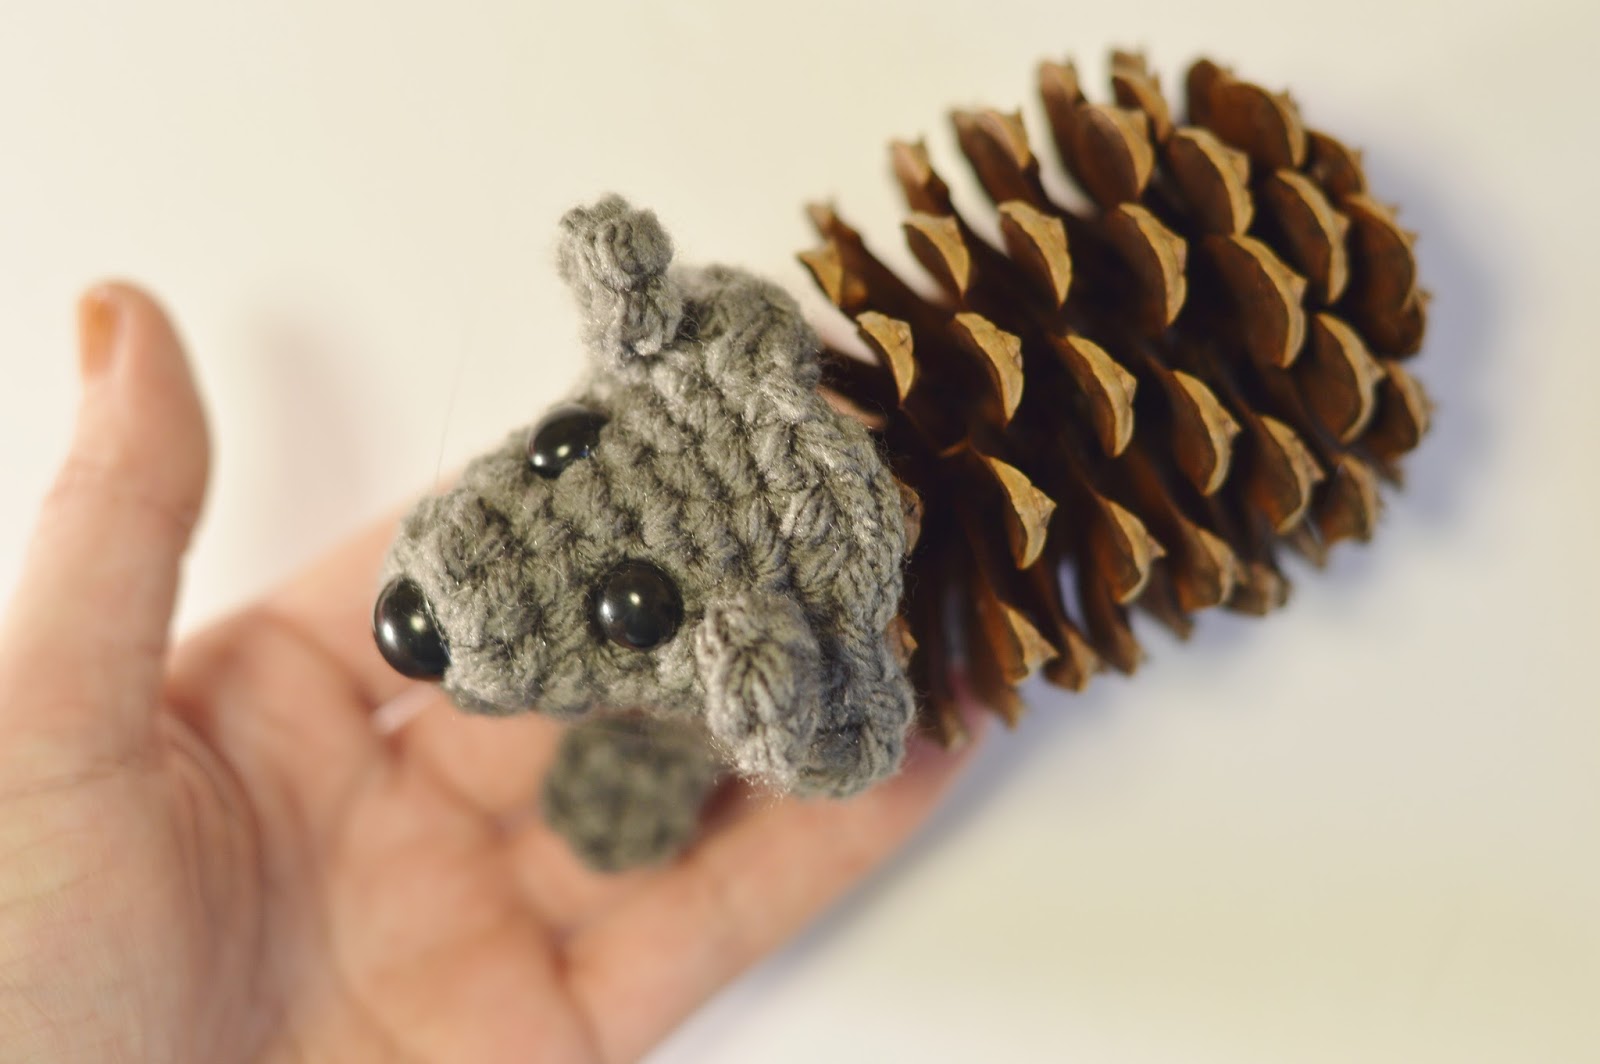
If you can not find pine cones in your area, you can find them at Wal-marts and even dollar stores. I got really lucky that my fiance, Sean found some beautiful ones where he works. Isaac and I spent an afternoon walking around our backyard, but all we could find were little ones that I didn't really want to use, but we had fun walking around in the beautiful fall weather.


I had a lot of fun creating these cute little pine cone hedgehogs! Keep scrolling for the written pattern and the video tutorial.


Pine Cone Crochet Hedgehog
Materials
Size G crochet hook
Red Heart With Love Yarn or Super Saver in Gray or Tan or similar yarn
Scissors
Darning Needle
Measuring Tape
Hot Glue Gun or other glue that you prefer
Pine cone(s)
Safety eyes or yarn for making the eyes and nose
Safety eyes or yarn for making the eyes and nose
Abbreviations
Ch: chain
Sl St: Slip stitch
sc: single crochet
hdc: half double crochet
dc: double crochet
cc: color change
sc2tog: single crochet decrease
cc: color change
sc2tog: single crochet decrease
The Pattern
*For pine cones that are about 2.5-3.5 inches long and about 6-8 inches at the widest point.*
R1: Make a loose slip knot or a magic circle and ch 2 (does not count as a dc), put 6dc into the loose slip knot or magic circle and slip stitch to the first dc. =6
R2: ch 1 (does not count as a sc here or throughout the pattern), 2sc into the same stitch, 2sc in each stitch around. Sl st to the first sc of the round. =12
R3: ch 1, sc in the same stitch and in each stitch around. Sl st to the first sc of the round. =12
R4: ch 1, 2sc in the same stitch, sc in the next stitch. *2sc in the next stitch, sc in the next stitch.* Repeat from the star around. Sl st to the first sc of the round. =18
R5: ch 1, sc in the same stitch and in each stitch around. Sl st to the first sc of the round. =18
R6: ch 1, 2sc in the same stitch, sc in the next 2 stitches. *2sc in the next stitch, sc in the next 2 stitches.* Repeat from the star around. Sl st to the first sc of the round.=24
R7: ch 1, hdc in the same stitch, dc in the next stitch, hdc in the next stitch, sl st in the next stitch. *hdc in the next stitch, dc in the next stitch, hdc in the next stitch, sl st in the next stitch.* Repeat from the star around. Skip the last stitch and sl st to the bottom of the ch1.
Cut the yarn, Weave in the ends.Try out the head on the pine cone and then glue to the pine cone.
Follow the pattern until R7.
R7: ch 1, sc in the same stitch and in each stitch around. Sl st to the first sc of the round. =24
R8: ch 1, 2sc in the same stitch, sc in the next 3 stitches. *2sc in the next stitch, sc in the next 3 stitches.* Repeat from the star around. Sl st to the first sc of the round. =30
R9: ch 1, hdc in the same stitch, dc in the next stitch, hdc in the next stitch, sl st in the next stitch. *hdc in the next stitch, dc in the next stitch, hdc in the next stitch, sl st in the next stitch.* Repeat from the star around but end with a dc. Sl st to the bottom of the ch1.
Cut the yarn, Weave in the ends.Try out the head on the pine cone and then glue to the pine cone.
*For pine cones that are smaller than the pine cones that I have patterns for, follow the pattern until the head fits the pine cone and end with instructions from R7, For pine cones that are larger than the pine cones that I have patterns for, follow the pattern until R7 and increase every other row until the head fits the pine cone. Then end with R7 of the pattern.
The Ears (make 2)
*For pine cones that are 2.5-3.5 inches long and 6-8 inches at the widest point.*
R1: Make a loose slip knot or magic circle and ch 1, 5sc in the loose slip knot. =5
Cut the yarn, pull through the last stitch and stitch the 2 bottom stitches together to shape the ear. Attach to the head and weave in the ends.
*For pine cones that are about 5-6 inches long and 10-11 inches at the widest point.*
R1: Make a loose slip knot or a magic circle and ch 1, 9sc in the loose slip knot. =9
Cut the yarn, pull through the last stitch and stitch the 2 bottom stitches together to shape the ear. Attach to the head and weave in the ends.
*For pine cones that are smaller or larger than the pine cones that I have patterns for, use more or less sc in R1. For really large pine cones, add another round of sc.
The Arms (make 2)
*For pine cones that are 2.5-3.5 inches long and 6-8 inches at the widest point.*
R1: Make a loose slip knot or magic circle and ch 1, 5sc in the loose slip knot, and sl st to the 1st sc. Ch 7, and in the second chain from the hook, put a sc into the back hump of the chain. sc in the back humps of the next 5 chains.
Cut the yarn, thread through a darning needle and thread through the first sc. Weave in the ends, and glue to the pine cone.
*For pine cones that are about 5-6 inches long and 10-11 inches at the widest point.*
R1: Make a loose slip knot or magic circle and ch 1, 9sc in the loose slip knot, and sl st to the 1st sc. Ch 8, and in the second chain from the hook, put a sc into the back hump of the chain. sc in the back humps of the next 6 chains.
Cut the yarn, thread through a darning needle and thread through the first sc. Weave in the ends, and glue to the pine cone.
*For pine cones that are smaller or larger than the pine cones that I have patterns for, use more or less sc into the loose slip knot or the magic circle and use more or less chains in the arm. For really large pine cones, add another round of sc.
Optional:
Add a bow, flower, beads, Santa hat, etc
Santa Hat
*For pine cones that are about 2.5-3.5 inches long and 6-8 inches at the widest point.*
Start with white:
R1: Make a loose slip knot or a magic circle and ch 16, Sl st to the first ch. =16
R2: Ch 1 (does not count as a sc), sc in the same stitch and in each stitch around. cc to red in the last stitch. =16
R3: Ch 1, sc in the same stitch, sc in the next 9 stitches. Ch 2 and skip the next 2 stitches, sc in the next 4 stitches. Sl st to the first sc of the round. =16
R4: Ch 1, sc in the same stitch, sc in the next 2 stitches, sc2tog, sc in the next 5 stitches, sc two times in the chain space, sc2tog, sc in the next 2 stitches. Sl st to the first sc of the round. =14
R5: Ch 1 sc in the same stitch, sc in the next stitch, sc2tog two times, sc in the next 3 stitches, sc2tog two times, sc in the next stitch. Sl st to the first sc of the round. =10
R6: Ch 1, sc in the same stitch, sc in the next stitch, sc2tog, sc in the next 2 stitches, sc2tog, sc in the next 2 stitches. Sl st to the first sc of the round. =8
R7-R8: Worked in a spiral with stitch markers. sc in each stitch around. =8
Cut the yarn, thread through a darning needle and thread through the 8 remaining stitches, pull tight to close the hole. Weave in the ends.
Add a puff ball.
If you loved this pattern you can purchase the pdf to download here.

Add a bow, flower, beads, Santa hat, etc
Santa Hat
*For pine cones that are about 2.5-3.5 inches long and 6-8 inches at the widest point.*
Start with white:
R1: Make a loose slip knot or a magic circle and ch 16, Sl st to the first ch. =16
R2: Ch 1 (does not count as a sc), sc in the same stitch and in each stitch around. cc to red in the last stitch. =16
R3: Ch 1, sc in the same stitch, sc in the next 9 stitches. Ch 2 and skip the next 2 stitches, sc in the next 4 stitches. Sl st to the first sc of the round. =16
R4: Ch 1, sc in the same stitch, sc in the next 2 stitches, sc2tog, sc in the next 5 stitches, sc two times in the chain space, sc2tog, sc in the next 2 stitches. Sl st to the first sc of the round. =14
R5: Ch 1 sc in the same stitch, sc in the next stitch, sc2tog two times, sc in the next 3 stitches, sc2tog two times, sc in the next stitch. Sl st to the first sc of the round. =10
R6: Ch 1, sc in the same stitch, sc in the next stitch, sc2tog, sc in the next 2 stitches, sc2tog, sc in the next 2 stitches. Sl st to the first sc of the round. =8
R7-R8: Worked in a spiral with stitch markers. sc in each stitch around. =8
Cut the yarn, thread through a darning needle and thread through the 8 remaining stitches, pull tight to close the hole. Weave in the ends.
Add a puff ball.
Copyright ©2016 Alexandra Halsey
You may sell any finished items, but I do request that you put a link back to my pattern and credit Alexandra Halsey for the original design under the Creative Commons Attribution Share Alike license. Do not copy, share, download or publicly display this pattern without permission.
I hope ya'll liked this pattern and video tutorial. If you like it, give it a share or a thumbs up, it only takes a second and I appreciate it so much! Also, if you haven't subscribed, subscribe now before you miss any of my videos. If you make your own pine cone hedgehog, I would LOVE to see! Post pics to my facebook page or tag me on instagram @_with_alexIf you loved this pattern you can purchase the pdf to download here.
Thanks a bunch! I hope ya'll are having a wonderful day!
Soft hugs and
